Independent Mode – Use the Print Server in a Local Network Without Internet Access(Mac)
This mode allows your computer to communicate directly with the print server without connecting to a router or the Internet.
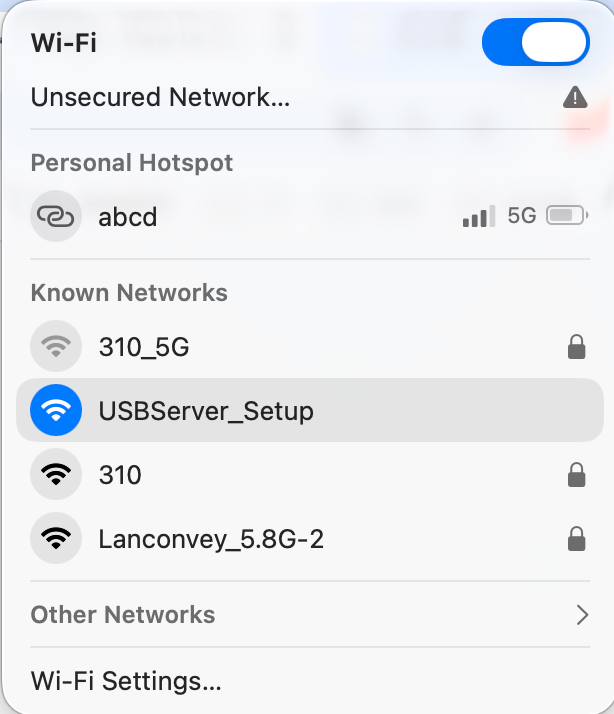
Step 1: Connect to the Print Server Wi-Fi
- On your computer, open the Wi-Fi settings.
- Connect to the wireless network:
SSID: USBServer-Setup
Note: This Wi-Fi network is created by the print server and does not provide Internet access. This is normal.
If a network configuration page pops up, you can close it.
Step 2: Add the Printer Manually
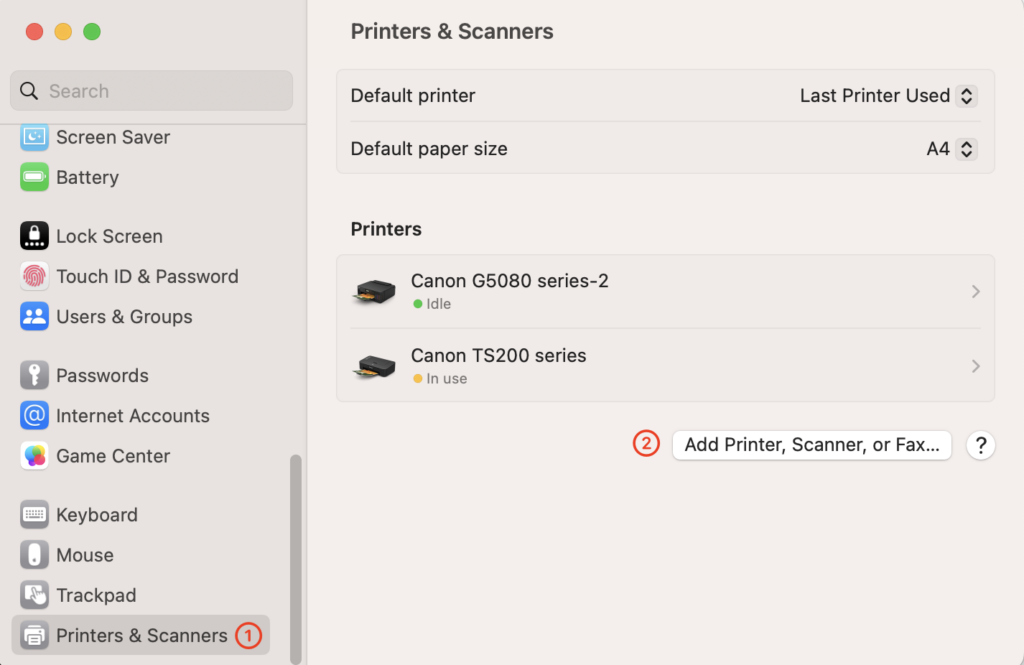
Open “Printers & Scanners” Settings
- Click the Apple icon in the top left corner and select “System Preferences.”
- Open the “Printers & Scanners” section.
- Click “Add a Printer, Scanner, or Fax” in the bottom left corner.
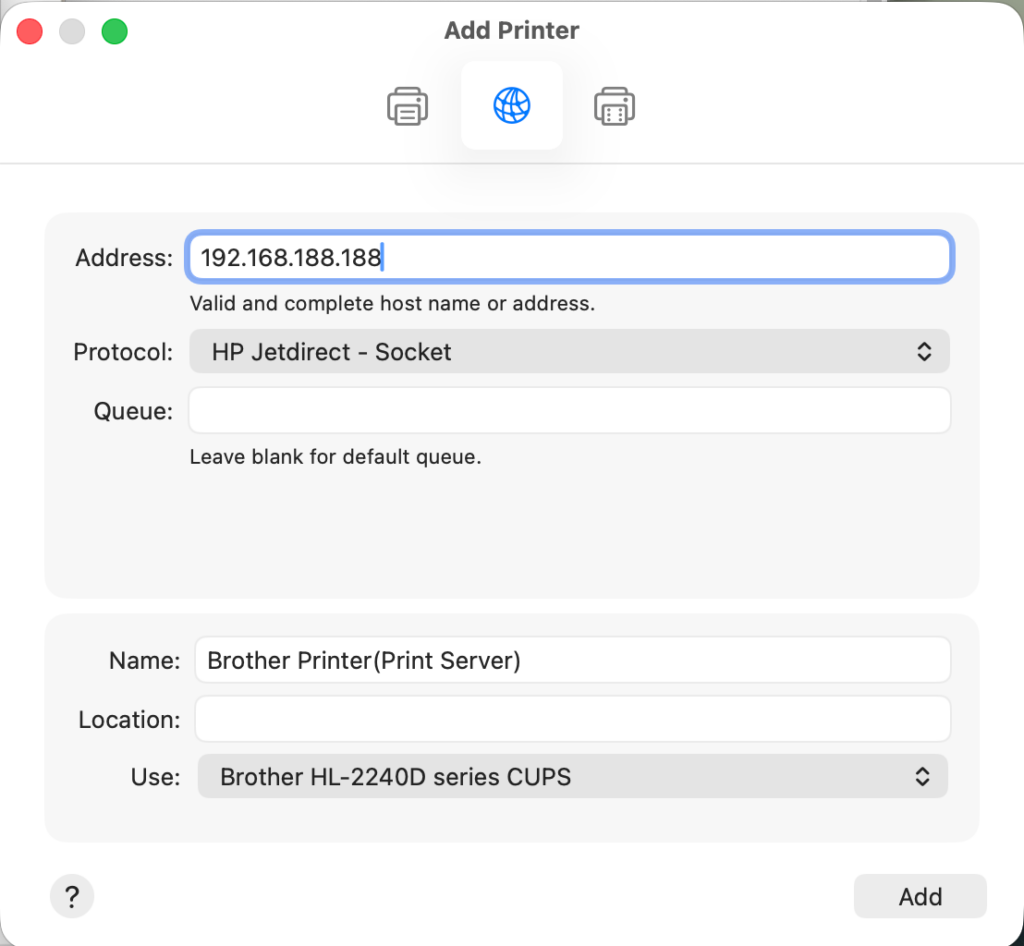
Step Three: Configure the IP Printer
- In the Address field, enter the IP address of the print server: 192.168.188.188
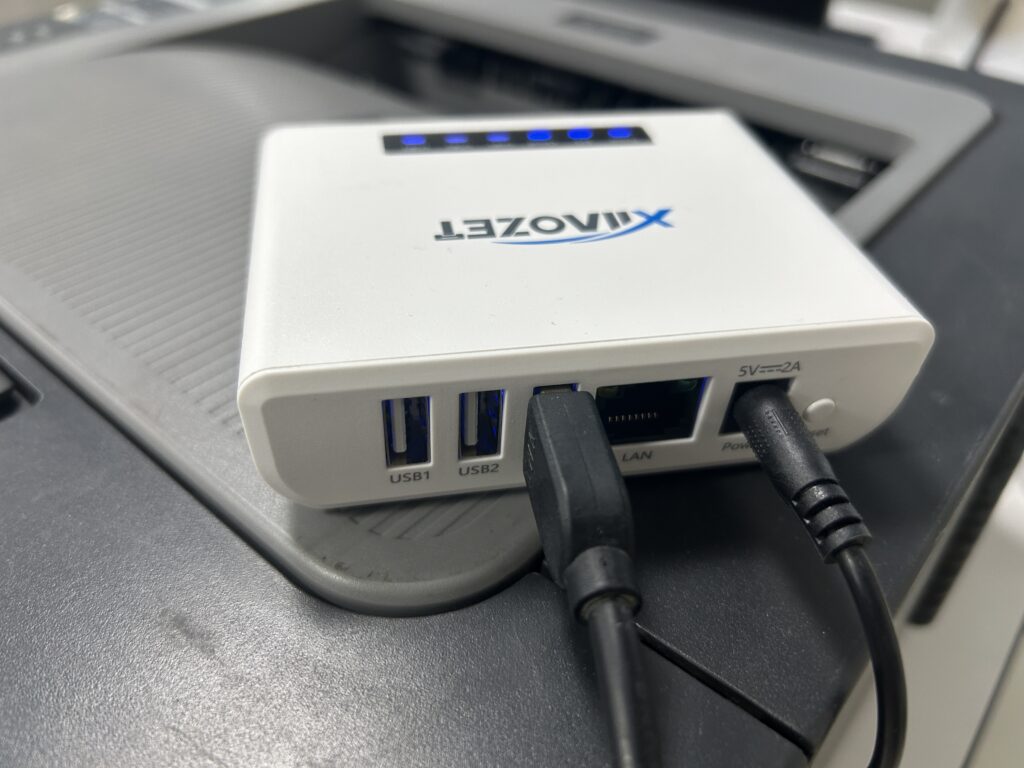
- You can find the IP address on the Label on the bottom of the device.
Note: For the LK300W and LK300EW models, use the correct port number!
For models such as the LK300W or LK300EW: Ensure the port assignment is correct according to the web management page.
- USB1: 9100 (e.g., 192.168.4.61:9100)
- USB2: 9101 (e.g., 192.168.4.61:9101)
- USB3: 9102 (e.g., 192.168.4.61:9102)

- In the “Protocol” drop-down menu, select “HP Jetdirect – Socket.” ( important! )
- Note: To avoid sending print jobs to the wrong printer, it is recommended to rename your printer to include ‘print server’.
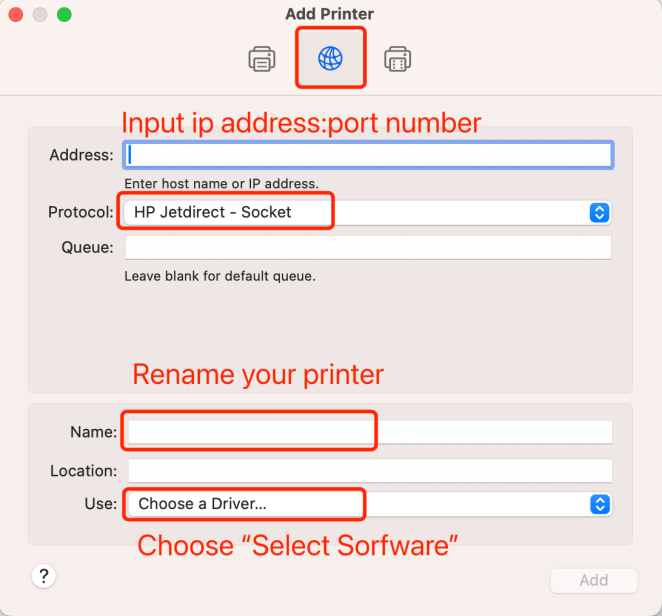
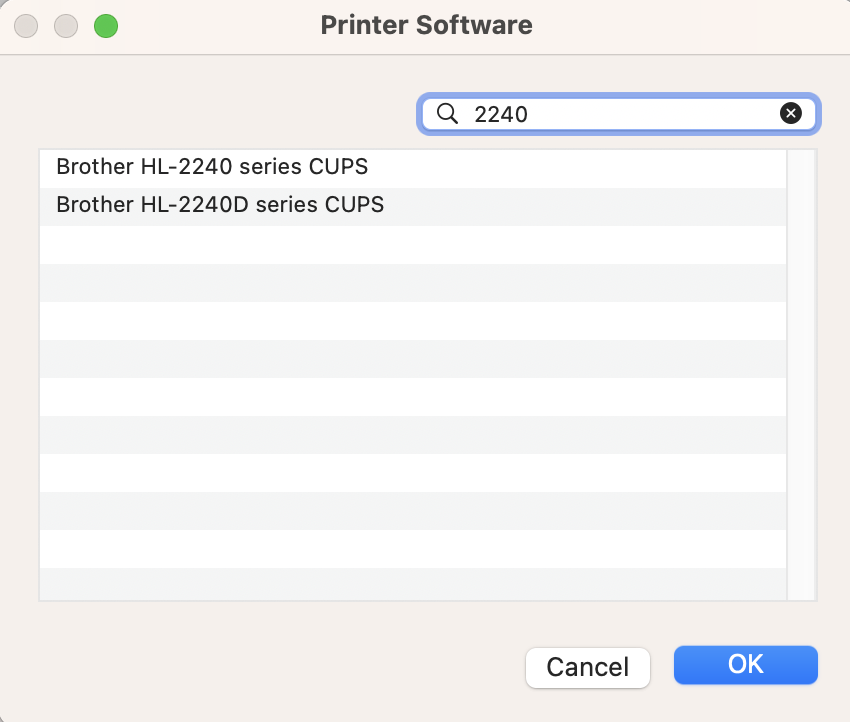
Step Four: Select the Printer Driver
- In the “Use” field, click “Select Software…” which will open a new window to choose the printer driver.
- In the driver list, find and select the driver that matches your printer model.
- Note: If the printer model cannot be found, it means that the printer driver has not been installed on the computer. You need to go back to Step One.
- Click the “OK” button to confirm your selection.
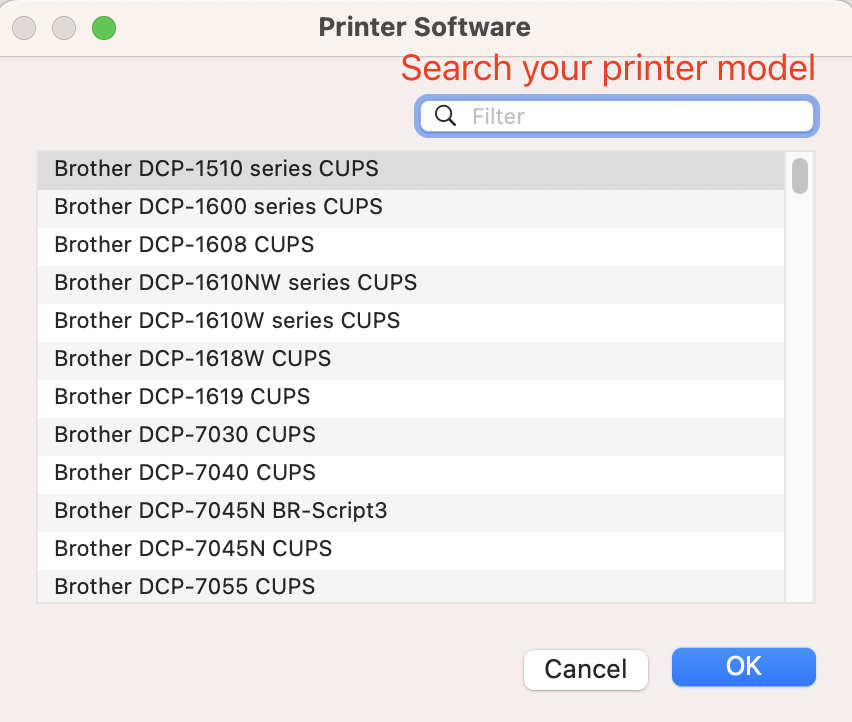
Take brother printer as an example:
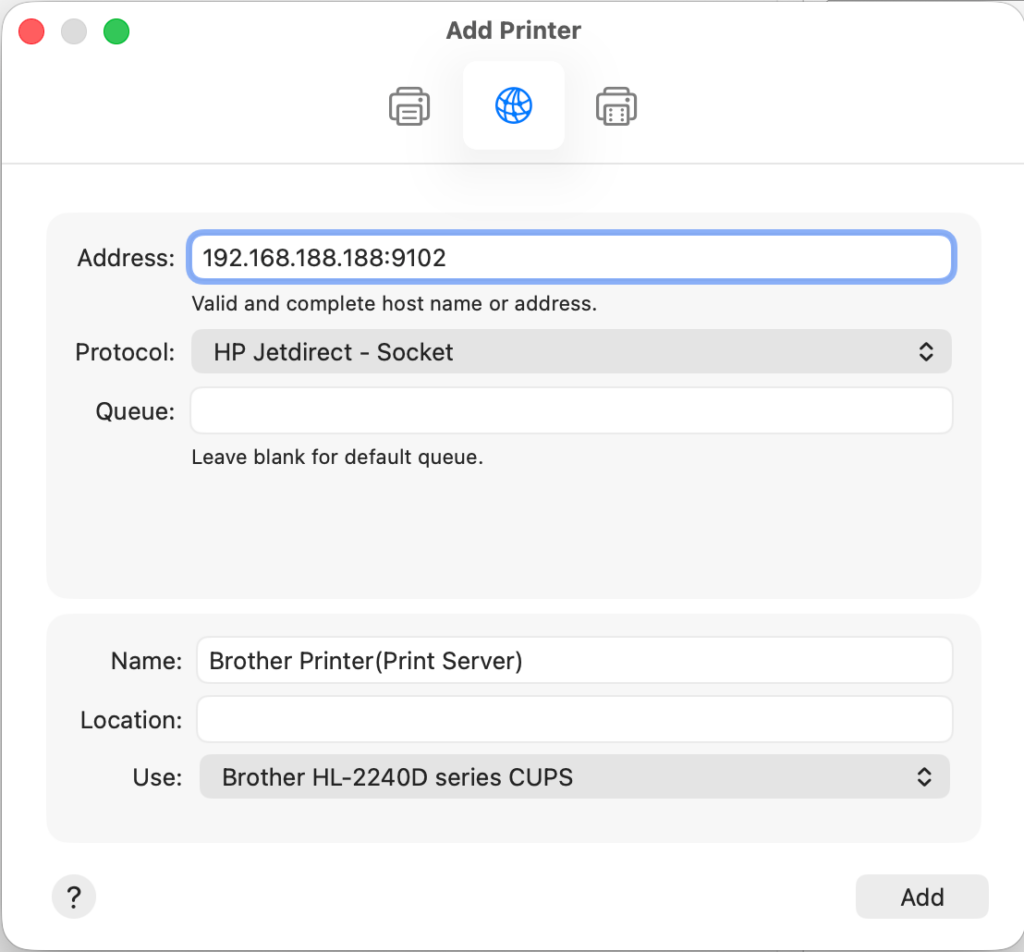
Important: Make sure all three of the following are correct:
✔ The correct IP address
✔ The correct port number
✔ The appropriate printer driver
The printer will only work properly if all three are set up correctly.
- After confirming that all settings are correct, click the “Add” button.
- Once added successfully, the newly added printer will appear in the “Printers & Scanners” list.
Step Five: Send a print job to the printer
Important !!! When sending a print job, make sure to select the newly added printer by its name.