How to Configure Wi-Fi for the Print Server When Your Computer Has No Wi-Fi Function
If your computer is connected to the router using a network cable and does not have Wi-Fi capability, you can first use your mobile phone to configure the print server’s Wi-Fi connection.
Method 1: Configure Wi-Fi Using a Mobile Phone
- Power on the print server.
- Use your mobile phone to connect to the Wi-Fi hotspot broadcast by the print server.
- Follow the Quick Start Guide to configure the print server and connect it to your 2.4 GHz Wi-Fi network.
- Wait approximately 30–60 seconds for the device to save the settings and reboot.
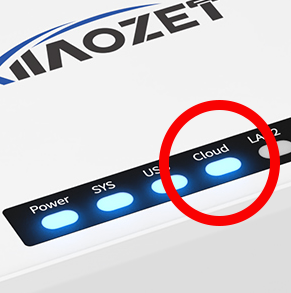
- Check the Cloud indicator light. If it stays solid, the Wi-Fi configuration has been completed successfully.
Method 2: Configure Wi-Fi Through the Web Management Page
If Wi-Fi configuration cannot be completed successfully using your mobile phone, please follow the steps below:
Step 1: Connect the Device to Your Computer
- Connect the print server directly to your computer using an Ethernet cable.
- Ensure the print server is powered on.
Step 2: Access the Management Interface
- Open a web browser on your computer.
- Enter the following address in the address bar:
http://192.168.188.188 - Log in using the default password:
admin
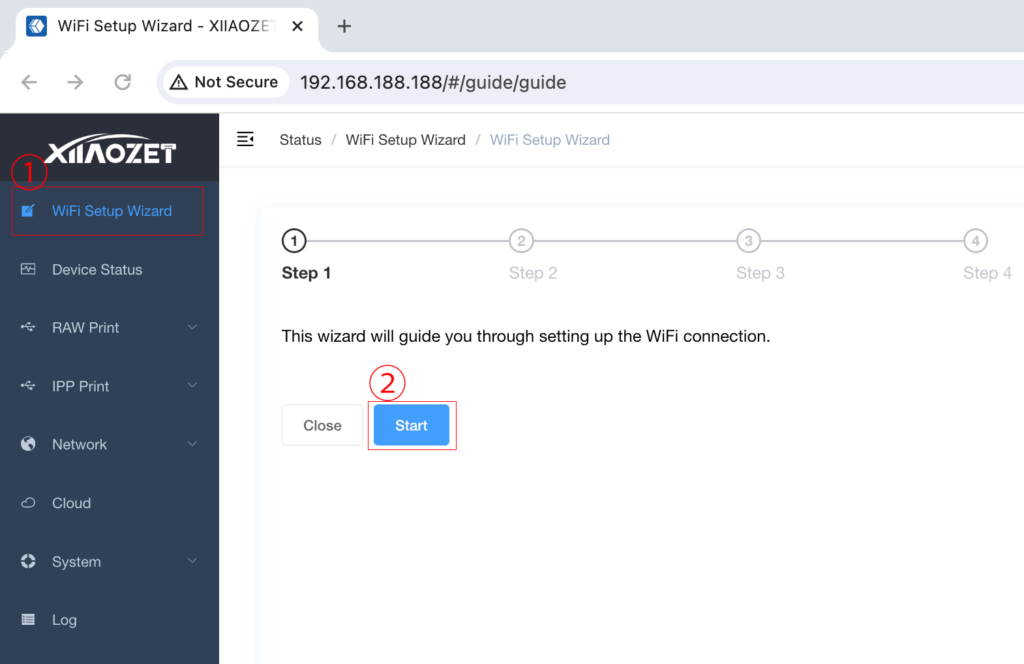
Step 3: Start the Wi-Fi Setup Wizard
- Navigate to Wi-Fi Setup Wizard in the toolbar.
- Click the Start button.
Step 4: Select Your Wi-Fi Network
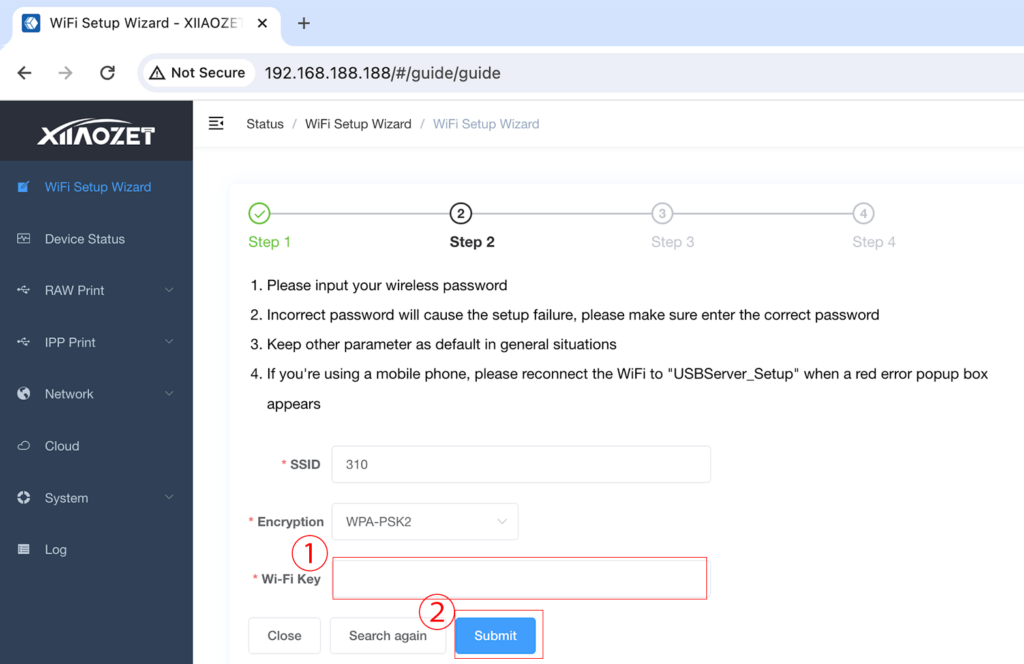
- After scanning is complete, select your desired 2.4 GHz Wi-Fi network from the search results.Note: Please make sure this Wi-Fi network is on the same local network where your computer and printing devices will be used.
Step 5: Enter the Wi-Fi Password
- Enter your Wi-Fi password in the Wi-Fi Key field.
- Click Submit.
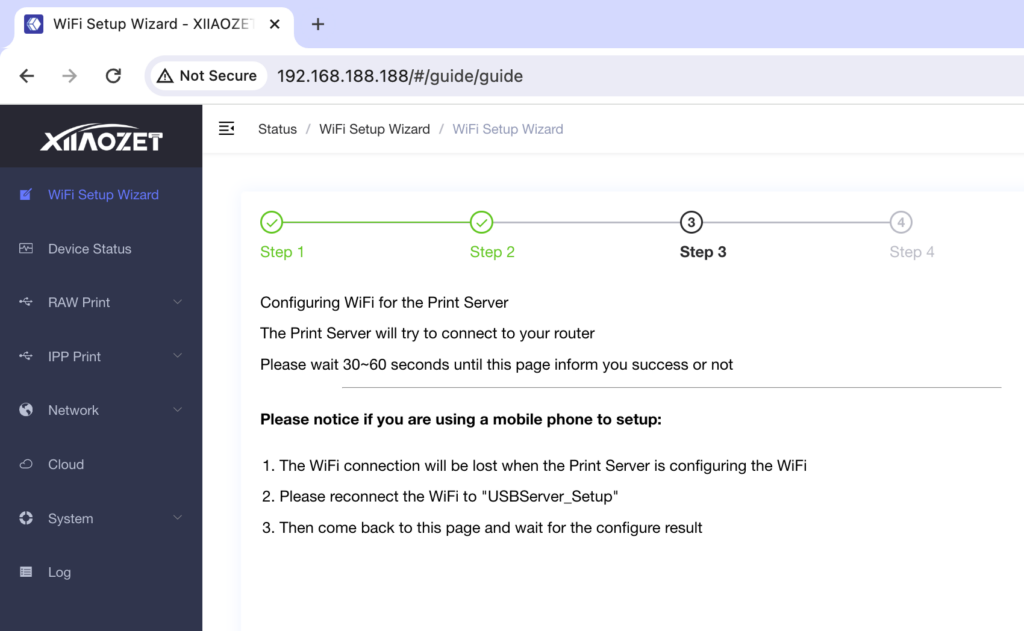
Step 6: Wait for Configuration to Complete
- After submission, the print server will automatically save the settings, reboot, and configure the Wi-Fi connection.
- Please allow 30–60 seconds for this process.
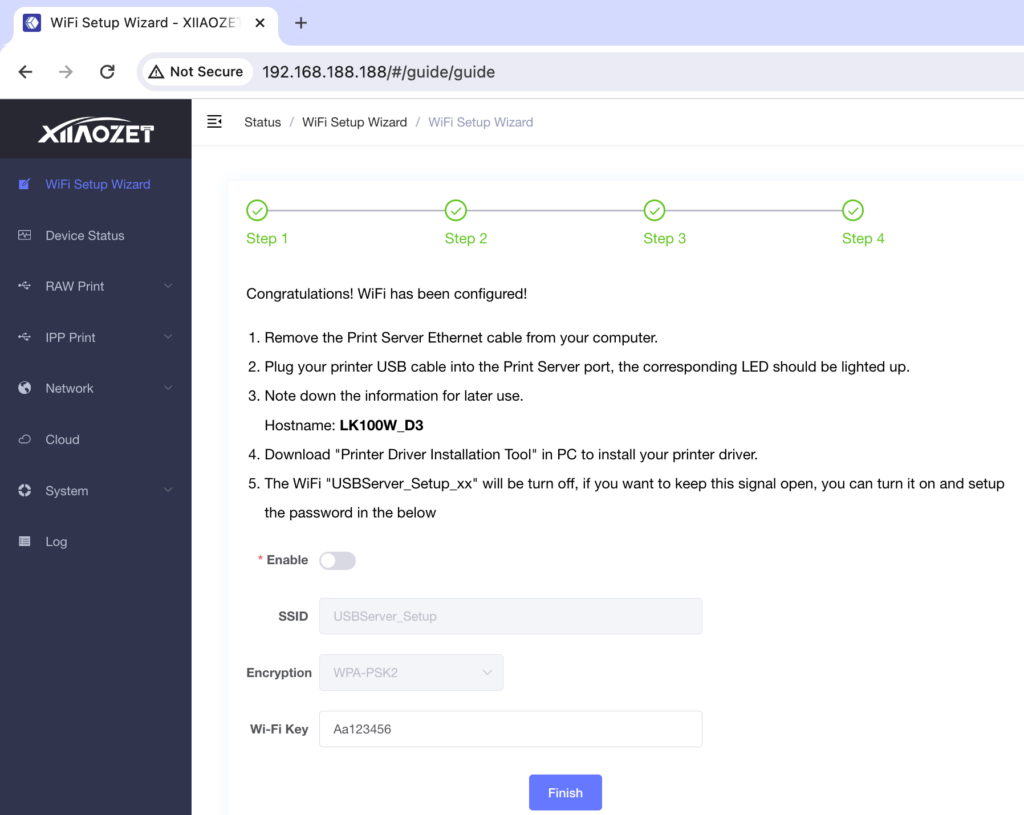
Step 7: Verify Successful Connection
- Check the Cloud indicator light.
- If the Cloud light remains solid, the Wi-Fi configuration was successful.
Step 8: Move the Device to Its Final Location
- Disconnect the Ethernet cable if it is no longer needed.
- Place the print server where you intend to use it.
- Connect the power adapter and wait for the Cloud light to become solid again.
- The print server is now ready for use on your Wi-Fi network.