Step2: LK100EW / LK300EW to Share USB Device Over Network User Guide
This document provides a detailed guide on how to use the Virtual USB Tool to enable USB device connectivity over the network for LK100EW and LK300EW print server models.
Principle Explanation
Connecting a Printer or Scanner
This solution is applicable to all printers and scanners.
Some printers, such as Canon’s LBP series (which use the CAPT language) and certain Ricoh models (which use the DDST language), do not support Windows’ built-in TCP/IP protocol for shared printing. To enable multiple computers to share these printers, virtual USB Connect Tool is required.
You can think of the virtual USB connection tool as simulating the plugging and unplugging of the printer’s USB cable via software. When connected, it functions as if the printer is directly connected to your computer, eliminating the need for any physical intervention.
Connecting Other USB Devices
The virtual USB connection tool can also be used for other USB devices. It simulates the plugging and unplugging of the device’s USB cable through software. When connected, it works just like the device is directly connected to your computer, without the need for physical interaction.
Due to the low-power design, it does not support high power-consuming device without an independent power supply.
Prerequisites
- Ensure the print server is configured on the network, the cloud indictor light is always on.
- Install the drivers for any USB devices you want to connect on your computer.
- Download and install the Virtual USB Connect Tool.
Note: Please prioritize using Download 1. If you are unable to download or use Download 1, please switch to Download 2. If both tools fail to function, please contact us for further assistance.
Steps to Use the Virtual USB Tool
Connecting a Printer
(Important!) Before using the tool, ensure the printer or scanner driver is installed on your computer. You can find the appropriate drivers on the official website of the printer or scanner brand.
- Run the “Virtual USB Client” software after installation.
- The software will automatically detect USB servers on the local network and display connected device information.
- Select the printer or scanner you wish to connect to. Click “Connect” to establish a connection. The status will change to “Connected”. This action simulates a virtual connection between your printer or scanner and the computer.
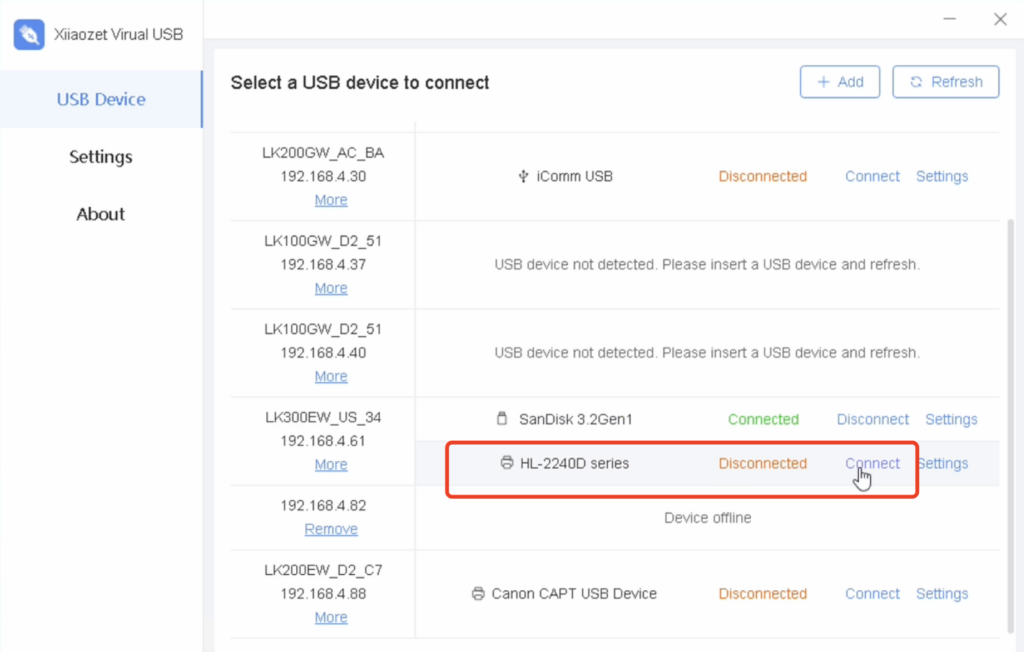
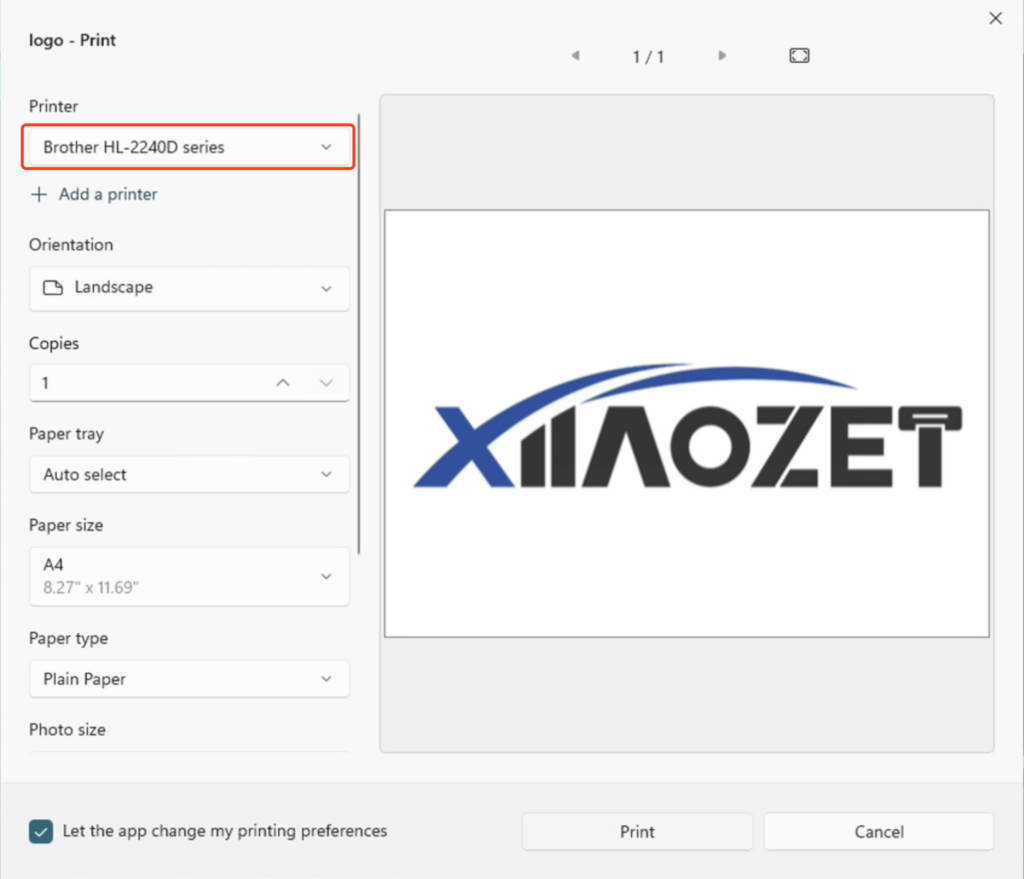
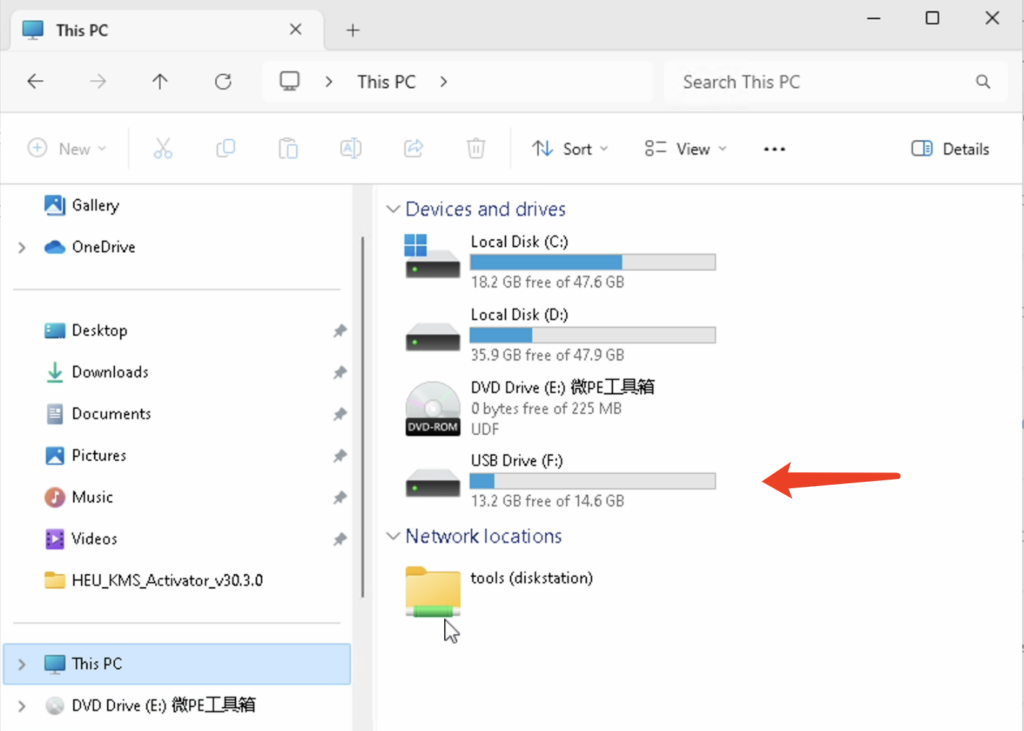
- You can see the connected device listed under Local Printers & scanner.
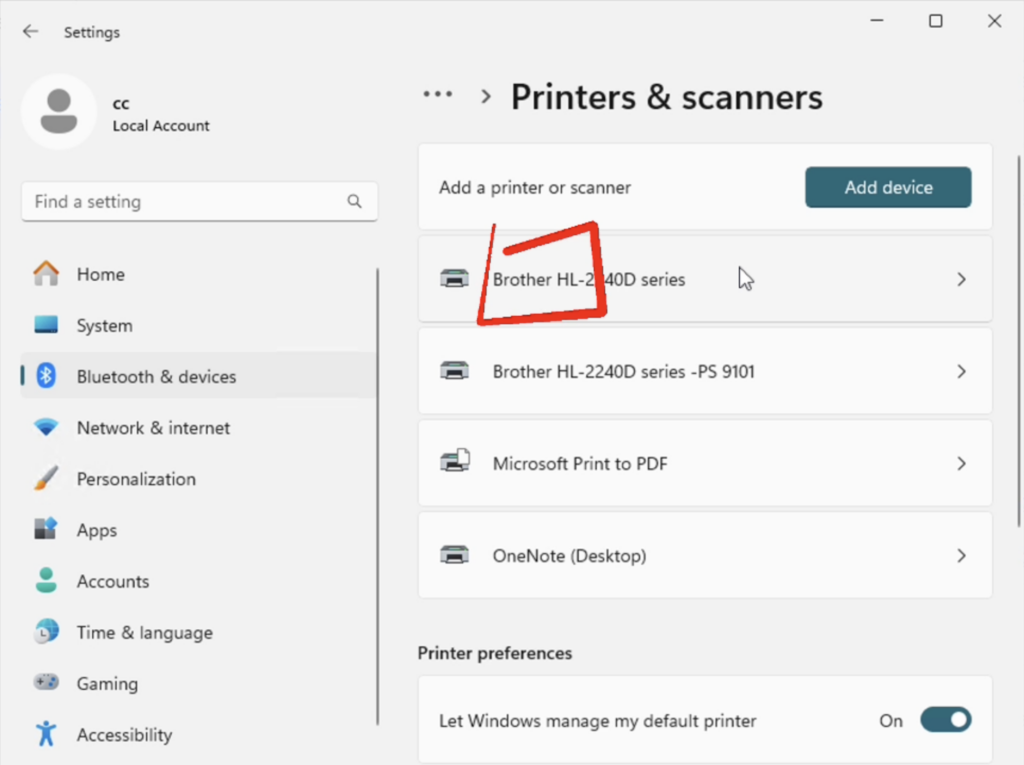
- When printing, simply choose the corresponding printer from the list.
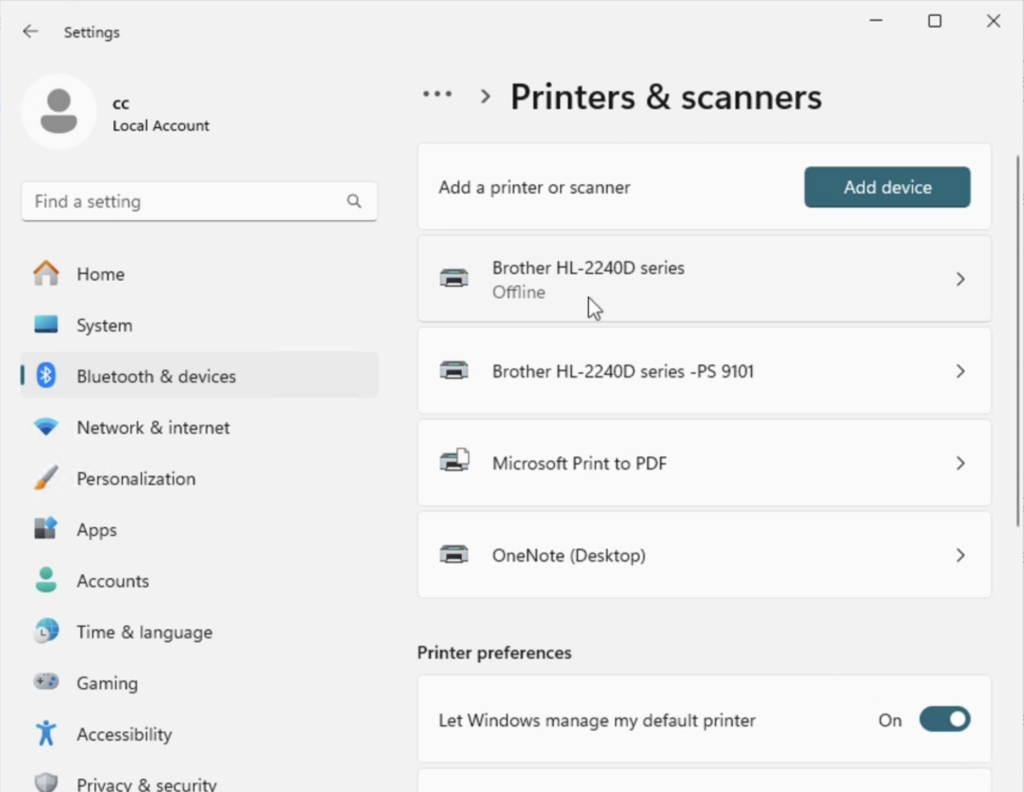
- To disconnect, click “Disconnect” on the software interface. The printer or scanner will show as Offline.
Connecting Other USB Devices
- In the software interface, select the USB device you wish to connect.
- Click “Connect” to establish a connection. The status will change to “Connected.”
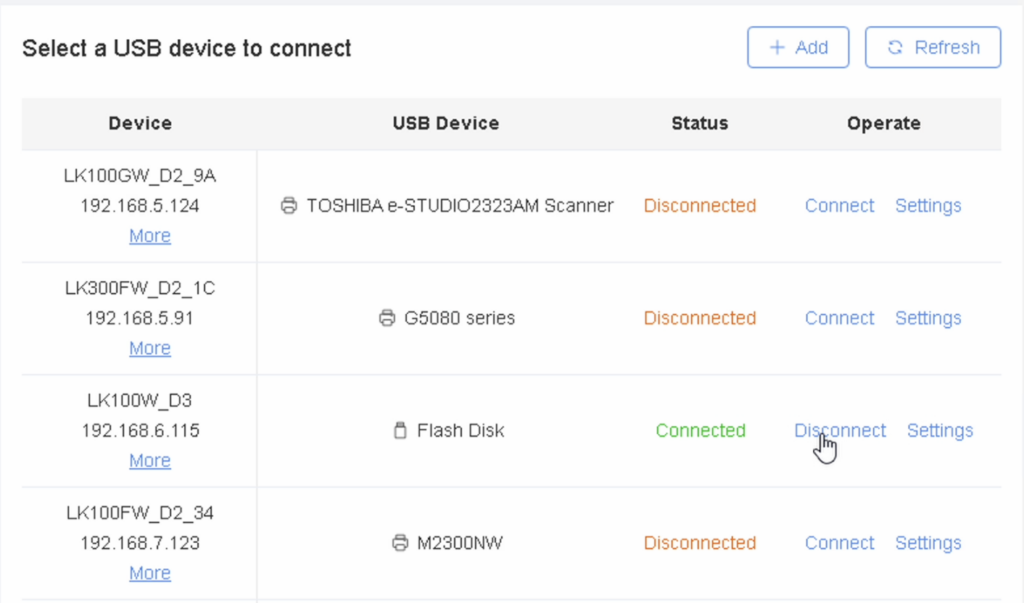
- To disconnect, select the device again and click “Disconnect.” The status will change to “Disconnected.”
Connecting a Scanner
- In the software list, select the scanner and click “Connect.” The status will change to “Connected.”
- If the scanner driver was previously installed on the computer, proceed with the usual scanning process:
- Go to “Control Panel” -> “Devices and Printers.”
- Right-click the scanner or printer and select “Start scan.”
- If the “Start scan” option is not available in “Devices and Printers,” install the scanner driver either from the manufacturer’s website or using a driver utility such as Driver Genius.

Note: After using the scanning function, remember to disconnect the USB device in the software to avoid any issues with printing functionality.
I connected my HP LaserJet 1536dnf MFP wirelessly through the Xiiaozet LK300EW. Printing works fine, but the scanner does not respond when I try to scan from my PC. Your documentation says scanning is supported — is there a workaround?
Yes. The issue occurs when the scan function is started directly from the system’s Scanner app.
To enable scanning, please follow these steps:
1. Go to Settings → Devices → Printers and Scanners.
2. Select your default printer and click Manage.
3. Under the printer name, click the drop-down arrow and select Open Scanner.
4. Set the scan mode to Flatbed.
Scanning will work in Flatbed mode. However, the Feeder (ADF) mode may not be supported on some printer models.
Note:
After restarting the computer, you may need to repeat the above steps if the scanner does not respond.