User Guide- LK301E to Share USB Device Over Local Network -for Linux
Step 1: Configure Print Server to Connect to the Local Network
Wired Connection
Make sure the router or switch connected to the LK301E USB server has internet access and is in the same local network (LAN) as your computer.
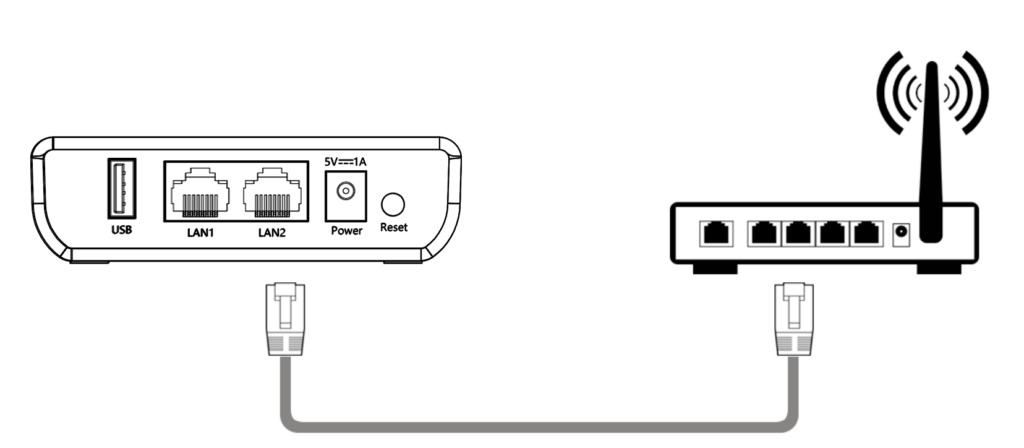
- Connect the USB device to the USB port of the LK301E.
- Connect the network cable from the LAN port of the LK301E to your router or switch.
- The USB server will automatically obtain an IP address assigned by the router via DHCP.
- When the Cloud indicator stays solid, it means the wired network connection is successfully established.
- Note:
If your network does not use DHCP, or if you prefer to assign a static IP to the print server, you’ll need to manually configure the IP settings via the device management page.
- Note:
Step 2: Use the Virtual USB Tool to enable USB device connectivity over the network
Download and install the Virtual USB Connect Tool.
lkvusb-app_0.2.2.deb – 75.48 MB
Connecting / Disconnecting to / from a USB device
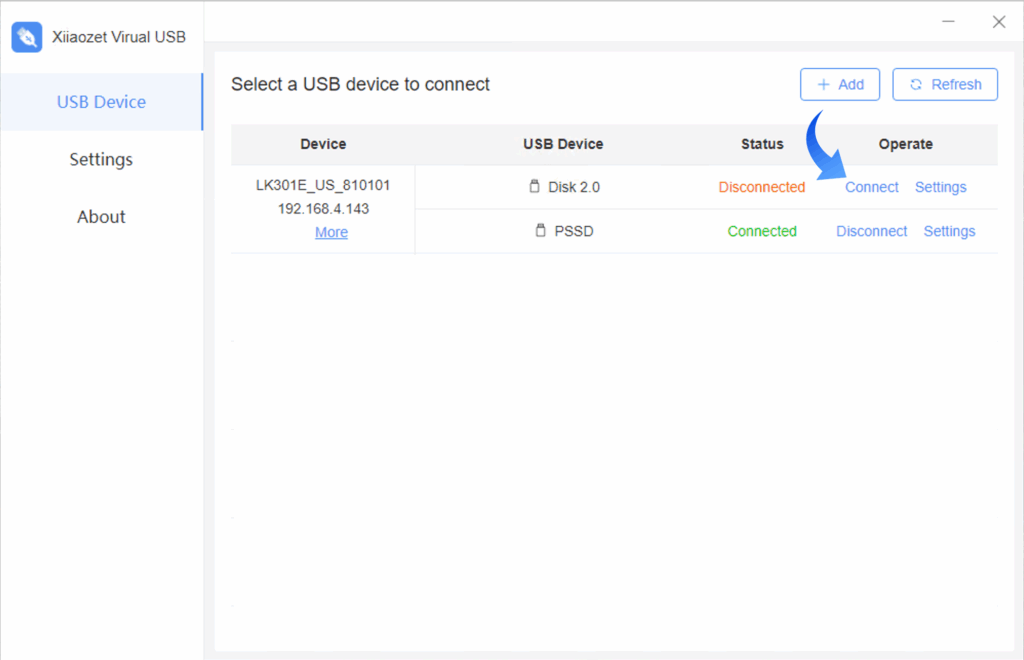
- Run the “Virtual USB Client” software after installation.
- The software will automatically detect USB servers on the local network and display connected device information.
- Select the USB device you wish to connect to. Click “Connect” to establish a connection. The status will change to “Connected”.
- This action simulates a virtual connection between your USB device and the computer.
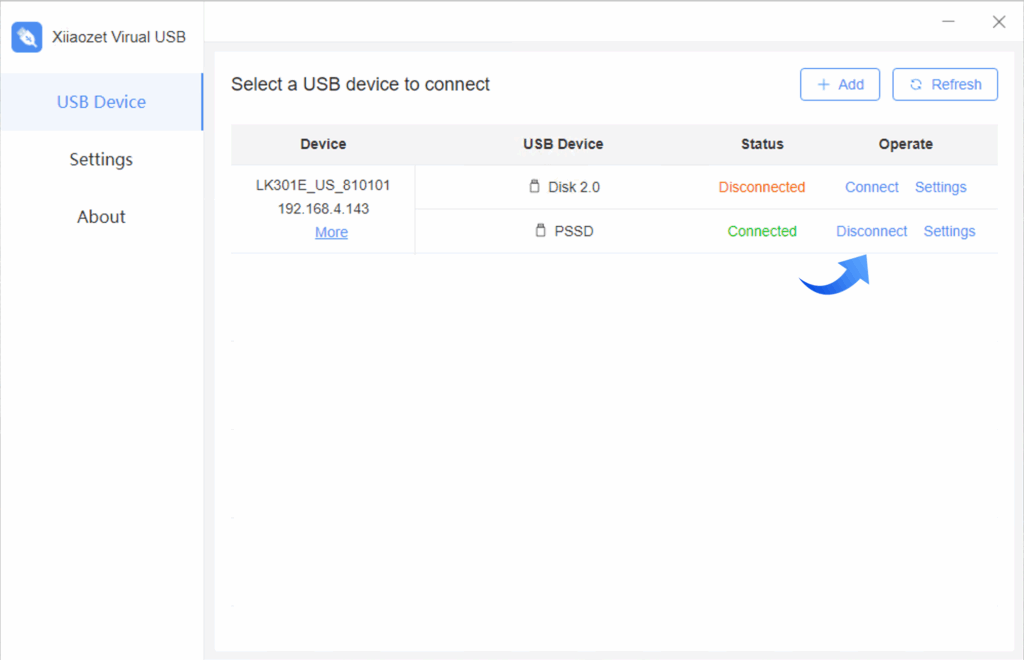
- Disconnect the device (if needed):
- In the tool, click “Disconnect” to release the USB device so that it can be used by another computer.
Important Notes:
- Each USB device can only be connected and controlled by one computer at a time.
- One computer can connect and control up to 3 USB devices simultaneously.
- If another computer needs to use a device, please disconnect it from the current computer first.
- Ensure your computer is on the same local network as the print server to ensure proper discovery and connection.
Frequently Asked Questions
A: To enable automatic connection to a specific USB device (as long as it’s available), follow these steps in the Virtual USB Connect Tool:
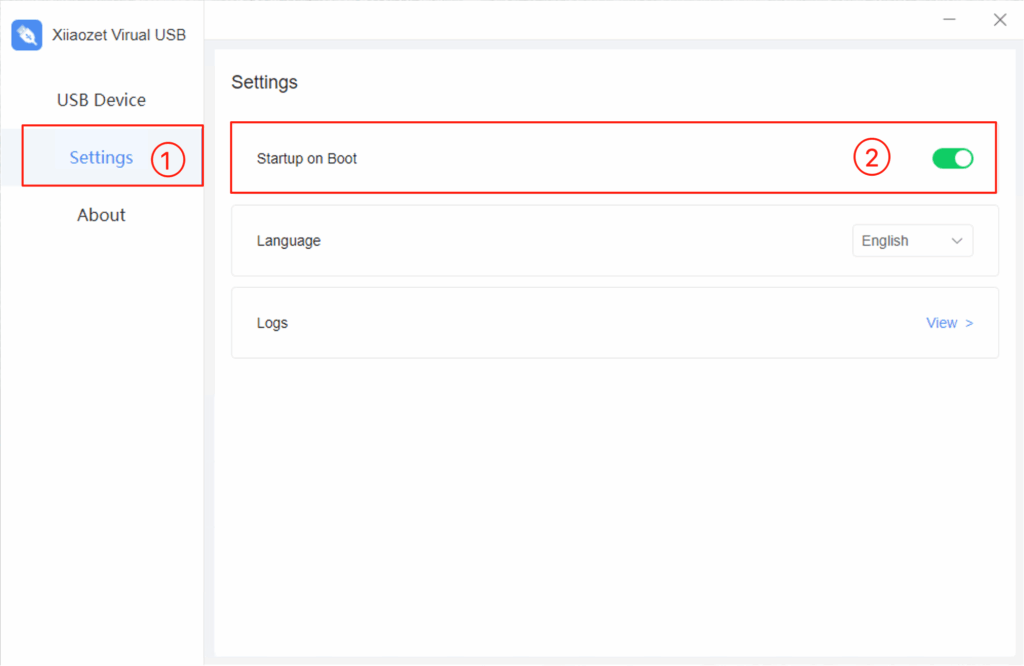
- In the left sidebar, go to “Setting” and enable “Start at boot” to launch the tool automatically with your system.
- In the device list, find the USB device you want to auto-connect to, then click the “Setting” icon on the right side of that device.
- Enable the “Auto Connect” option.
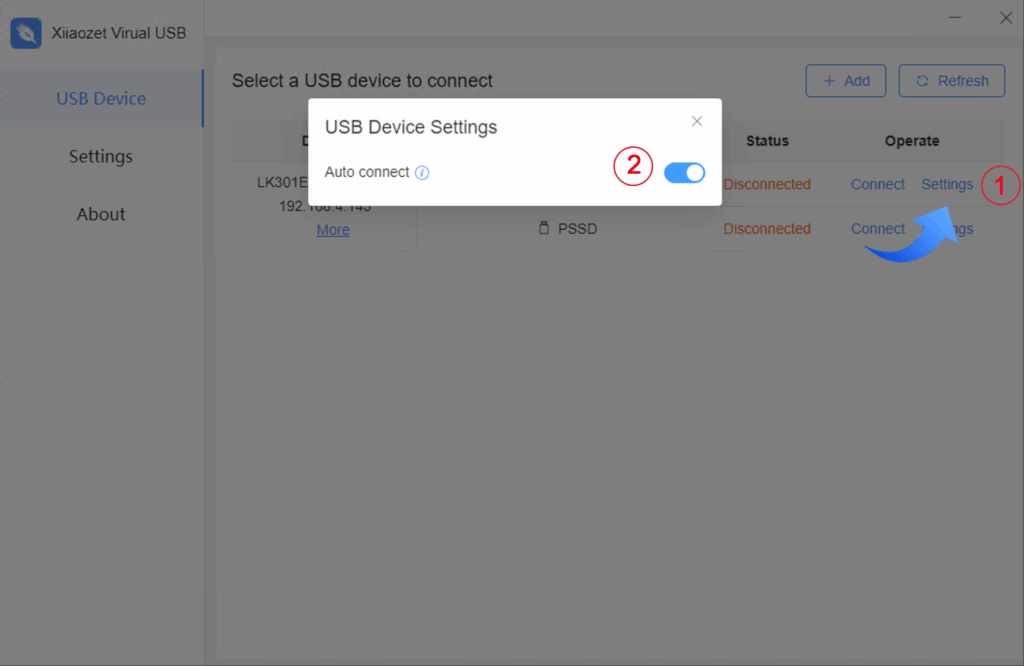
✅ Once enabled, the tool will automatically reconnect to the selected USB device each time it starts or whenever the device becomes available on the network.
💡 Note:
- If multiple computers have auto-connect enabled for the same device, only the first one to detect it will connect successfully.
- Only one computer can auto-connect to a specific USB device at a time.
If your device is not recognized after clicking “Connect”, try the following troubleshooting steps:
- Check device compatibility:
- Some USB devices, such as external hard drives, may not support virtual USB connections.
- Compatibility can vary by brand—certain brands may work, while others may not.
- Physically connect the device to your computer:
- Plug the USB device directly into your computer’s USB port to confirm that it works properly.
- Some devices, like printers or scanners, need to be physically connected at least once so the system can install the necessary drivers.
- After the drivers are installed, the virtual USB connection may start working correctly.
💡 Tip: Always ensure your USB device functions properly when connected directly before using it via the virtual connection.