Step1: How to Configure Print Server to Connect to the Local Network (PrintBoxMini)
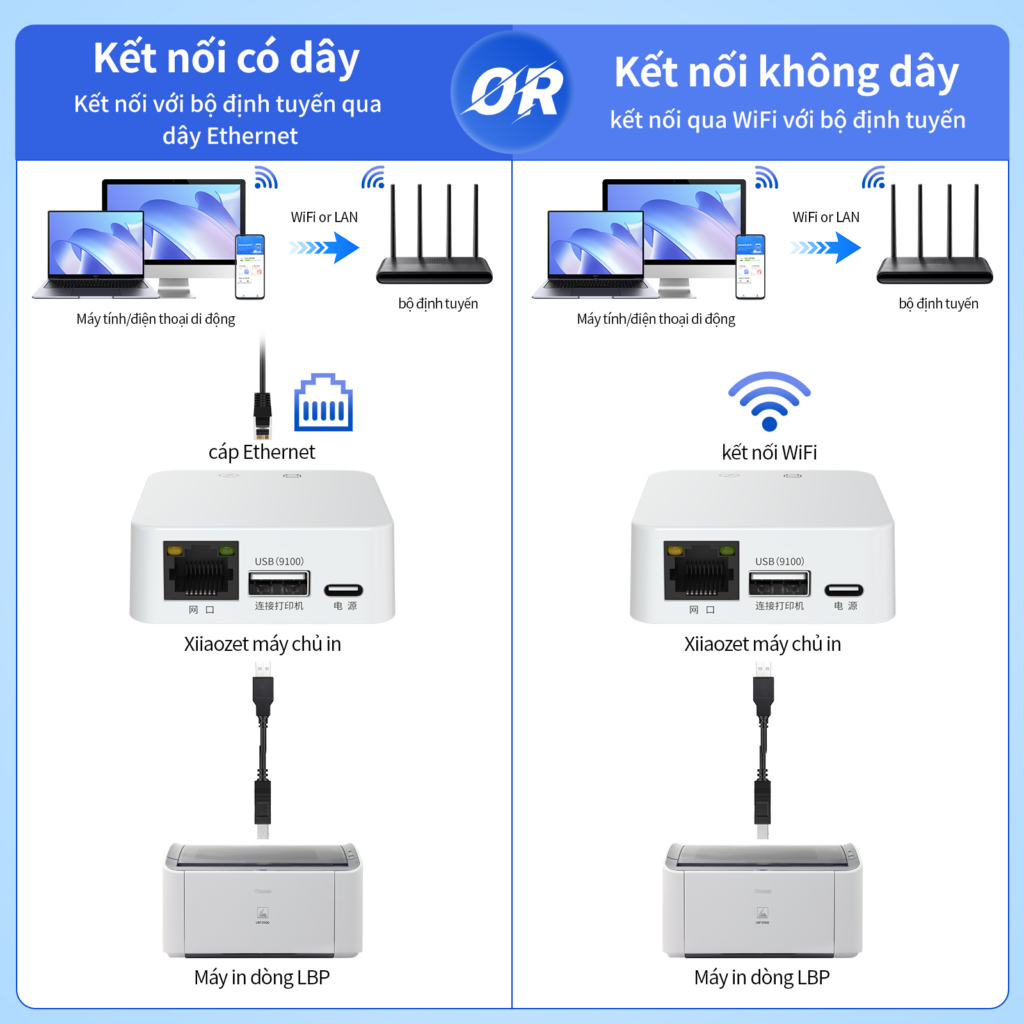
The print server can be connected to the network either through a wired or wireless connection.
Note: Please select only one method you prefer for connection.
Method One: Wireless Network Connection (via Automatic Popup Page)
The process can be completed via a computer or a smartphone.
(Note:Here are the network configuration steps for when the print server is in its initial state. If you can not find “USBServer_Setup”,please press the reset button for 5s to restore initial settings.)
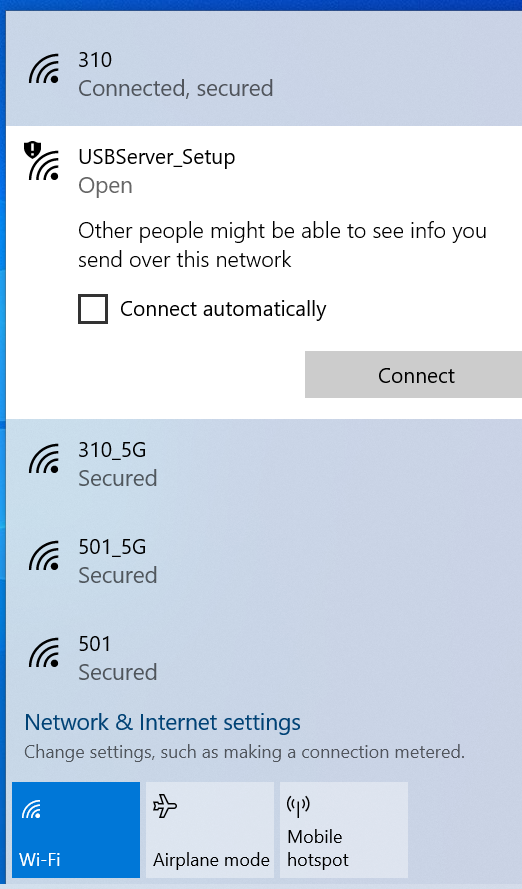
- Locate and connect to the Wi-Fi network named “USBServer_Setup” from your computer’s available networks list.

- Once you connect to USBServer_Setup, a network setup page will automatically pop up on your computer or phone.
- Note: If the network setup page did not automatically pop up, please setup network via Management Interface turn to Method Two.
- Simply select your 2.4G Wi-Fi and enter your Wi-Fi password. The printer server will then automatically configure the Wi-Fi parameters.
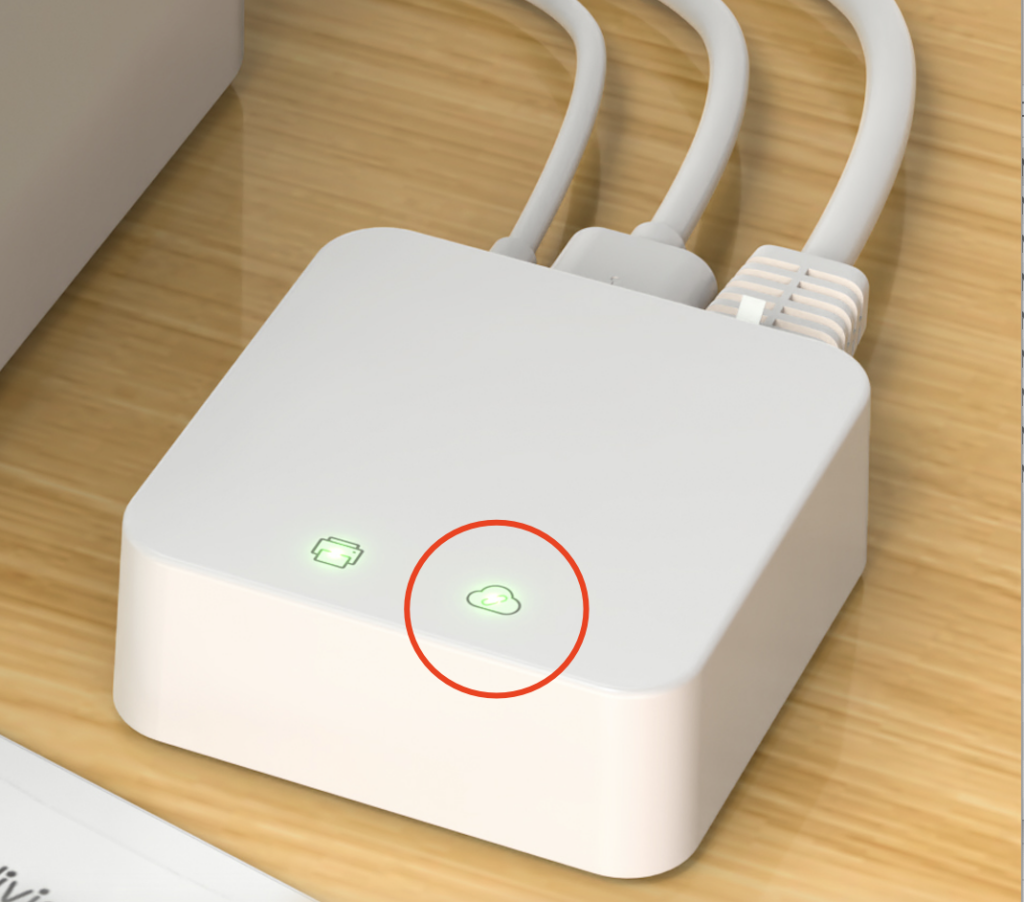
- Wait for about 1 minute, and when the cloud indicator light stays steadily lit, it indicates successful network setup.
- Observe the Cloud indicator light, which stays on to indicate successful configuration.
Method Two: Wireless Network Connection (via Management Interface)
- Locate and connect to the Wi-Fi network named “USBServer_Setup” from your computer’s available networks list. ( If you can not find “USBServer_Setup”,please press the reset button for 5s to restore initial settings.)
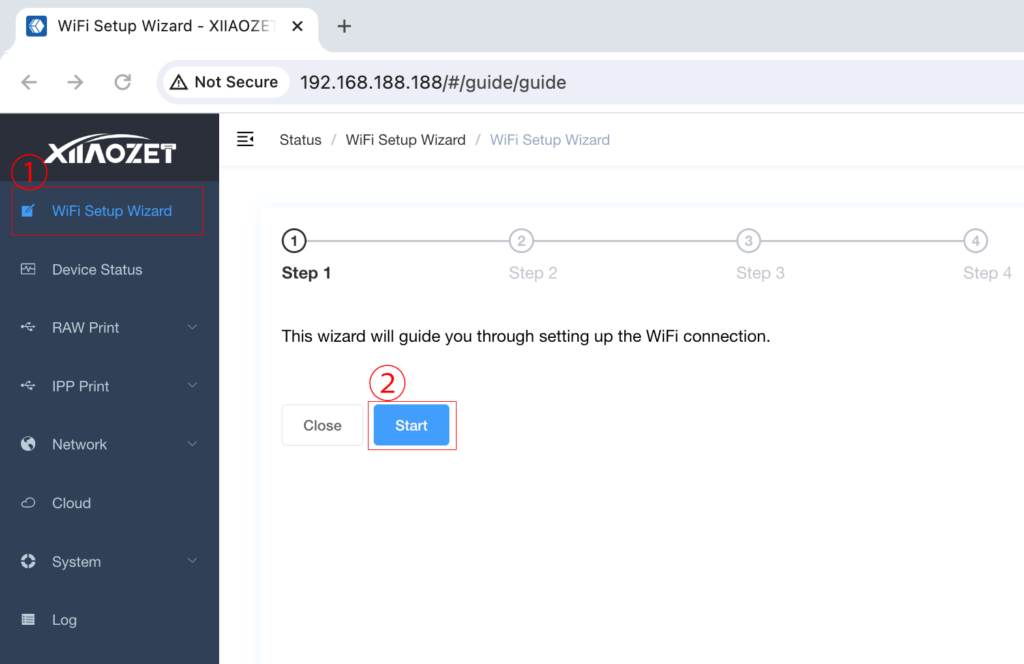
- Once connected to “USBServer_Setup” access the print server’s management interface by entering the IP address 192.168.188.188 into your web browser.
- Enter the key “admin” in the provided key box and click “Login”
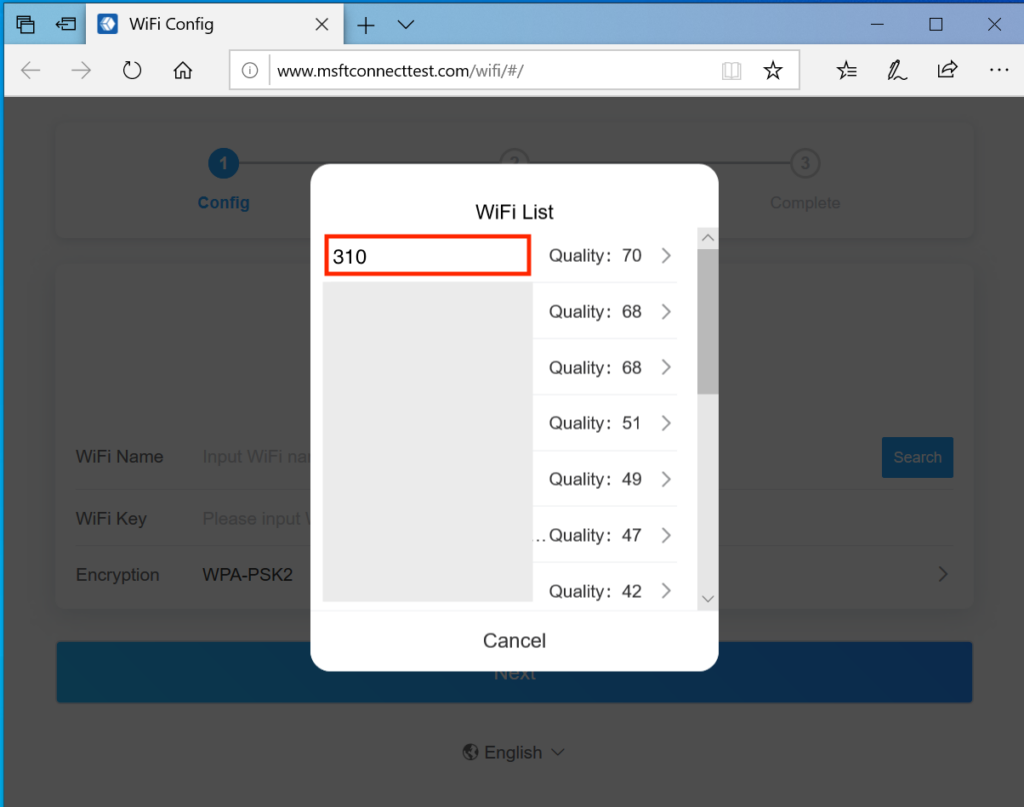
- Navigate to the Wi-Fi Setup Wizard in the toolbar and click the “Start” button.
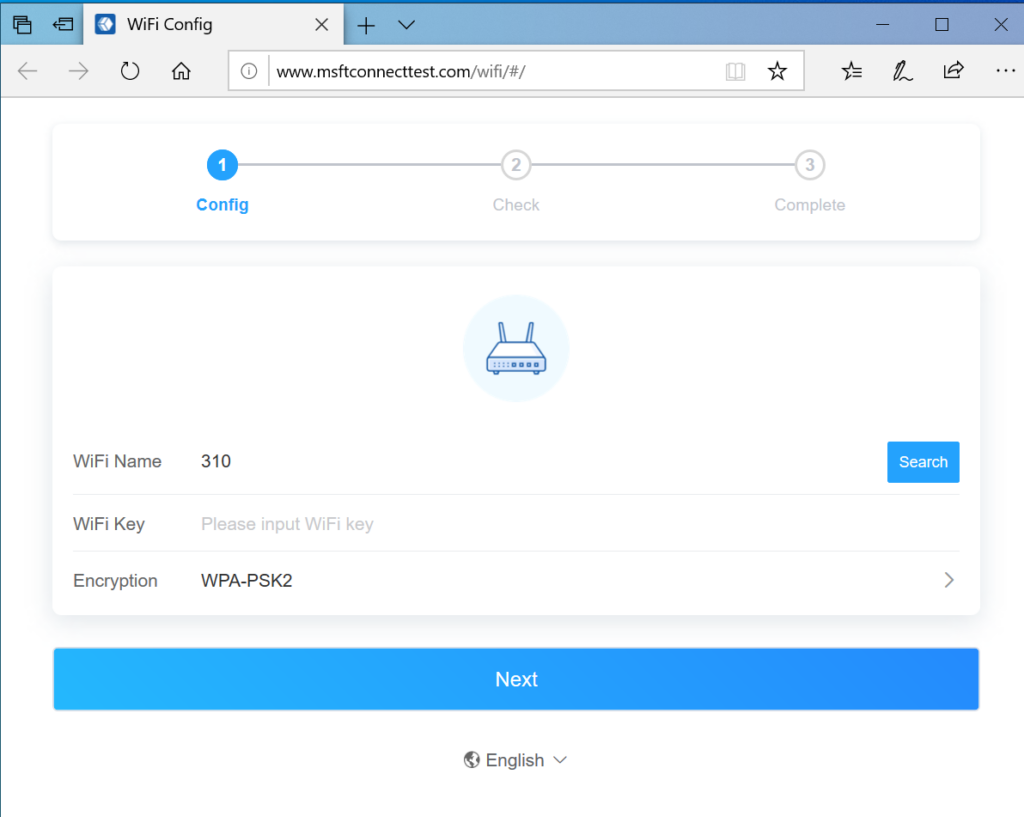
- Upon starting, select your desired 2.4G Wi-Fi network from the search results.
- (Note: Ensure this Wi-Fi network is on the same local network as the computer where printing tasks will occur.)
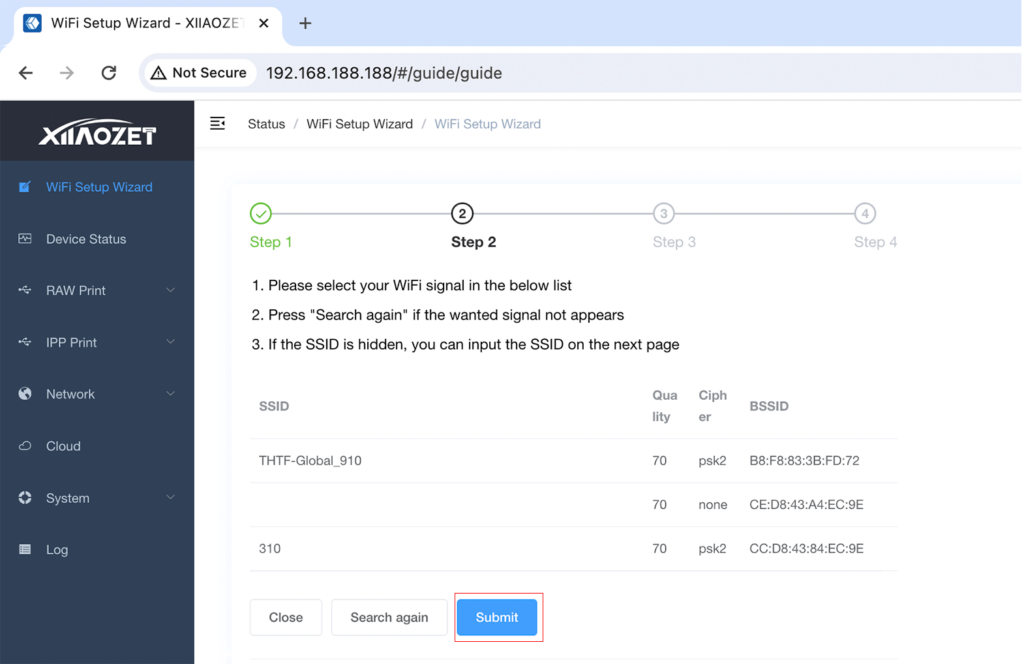
- Enter the password for the selected Wi-Fi in the Wi-Fi key box and click the “Submit” button.

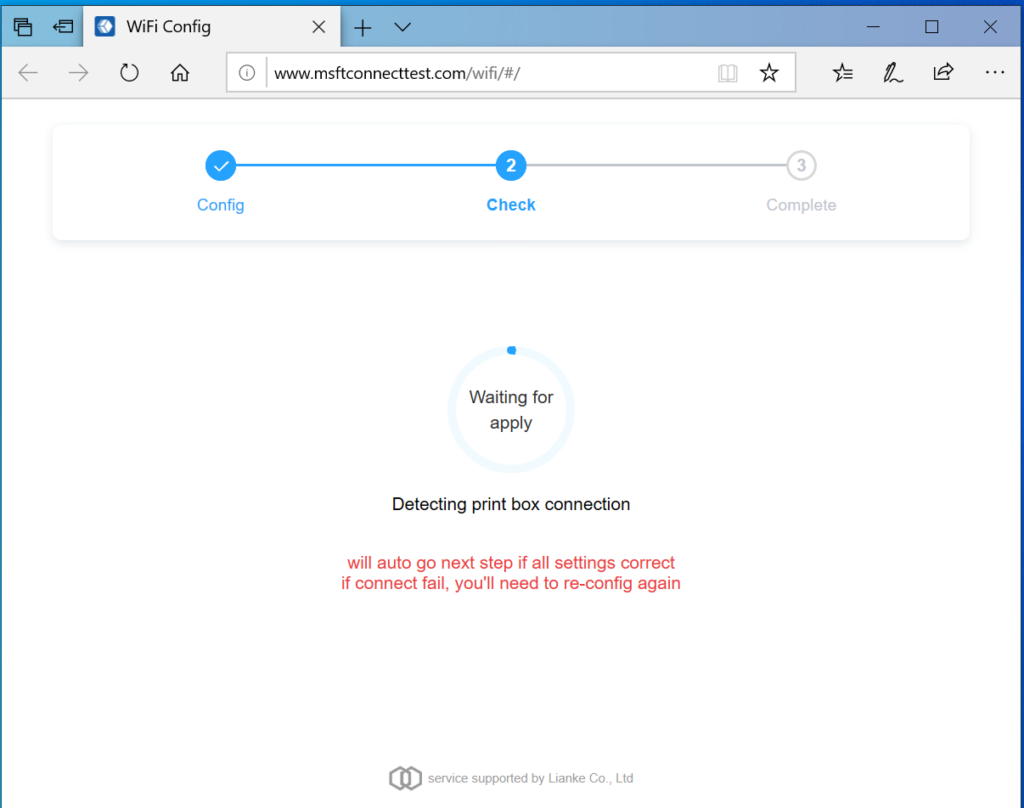
- After submission, the print server will proceed to save, reboot, and configure the Wi-Fi parameters. Allow 30-60 seconds for this process.
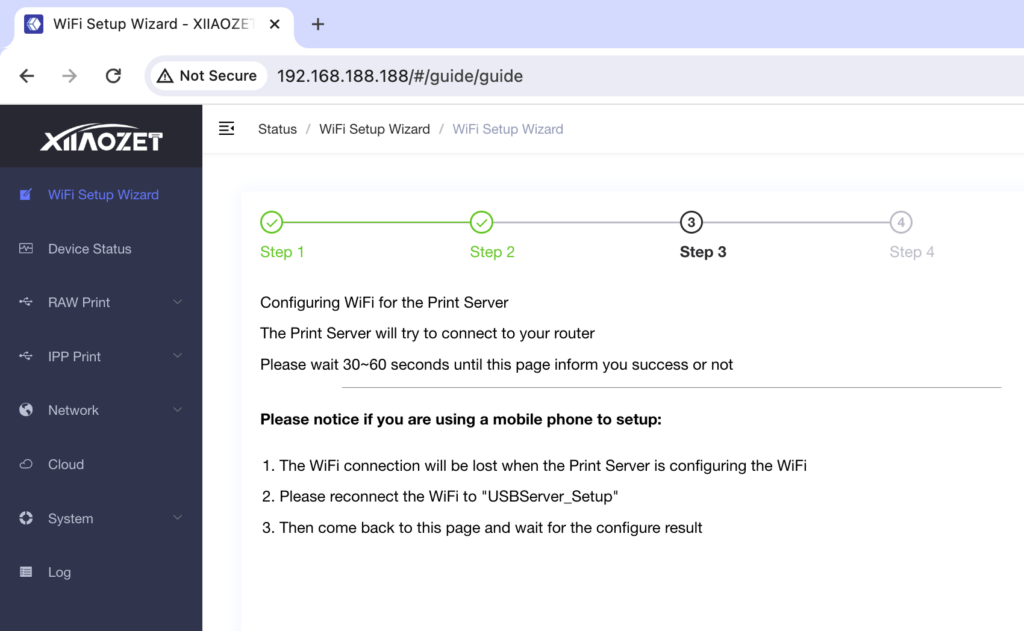
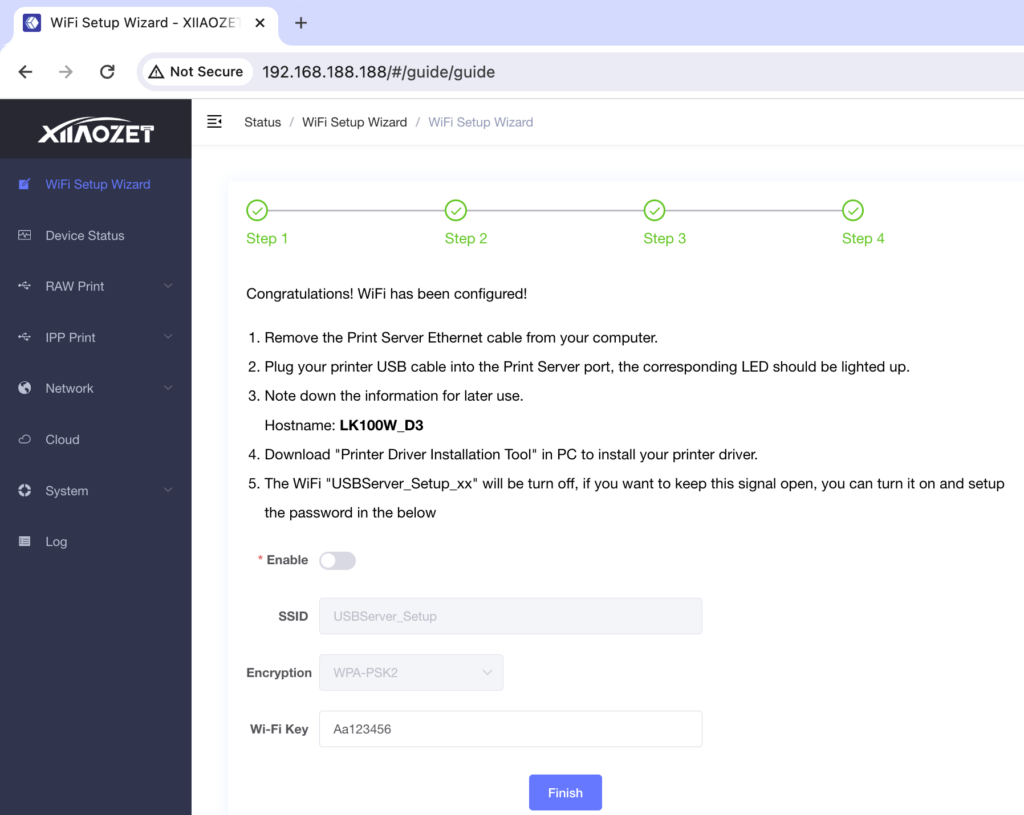
- Observe the Cloud indicator light, which stays on to indicate successful configuration.
Method Three: Wired Connection

- After powering on the print server and connecting the USB device, use an Ethernet cable to connect the LAN port of print server to the router or switch.
- The print server will obtain an IP address assigned by the router’s DHCP.
- The Cloud indicator remains illuminated, indicating that the wired network setup is complete.
- Note: If your local network doesn’t use DHCP for IP assignment, or if you prefer to assign a specific IP address exclusively for the print server, you’ll need to manually configure the IP address for the print server.
Net Step: Add your LBP Series printer to the computer
After completing the network configuration, please add the LBP printer on your computer. Refer to the tutorial on adding LBP printer via our installer.
Net Step: Printing from Mobile Phone
After completing the network configuration, please download our app to bind the print sever. Refer to the tutorial on printing from mobile phone.