How to Manually Add Printer to Computer with Hostname (Windows)
Note: We recommend using our independently developed quick installation tool for adding printers. Manual installation should only be considered if the quick installation tool is unavailable or cannot be used.
Our print server supports print protocols: RAW protocol, IPP protocol. Here are the steps to add a printer that supports RAW protocol.
!!! You need to download the driver corresponding to your printer model from the official website of the printer brand first.
💡Important Tip: Connect the USB Printer Properly
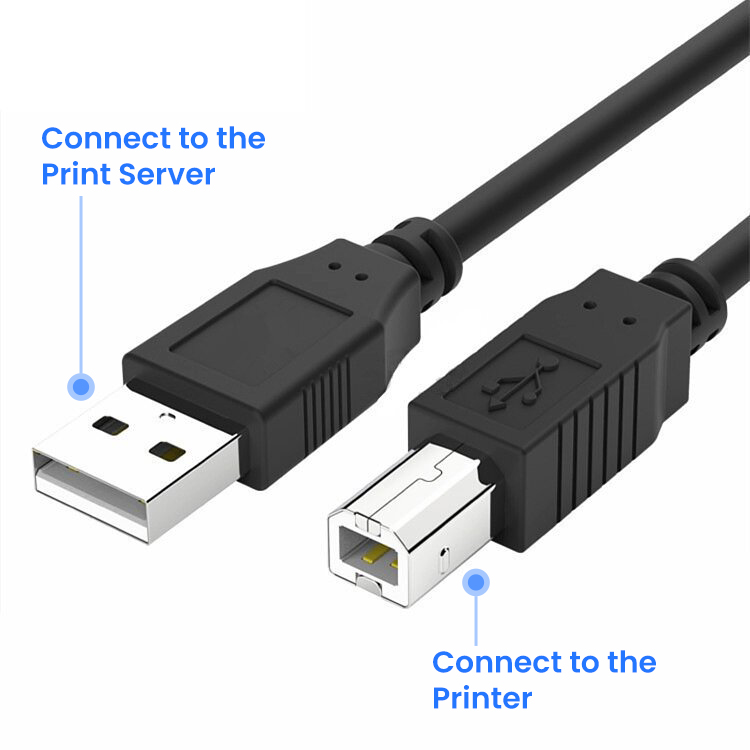
Please connect the USB cable of your printer to the USB port of the print server.
Make sure the square end (Type-B) is plugged into the printer, and the flat end (Type-A) is plugged into the print server.
This step is crucial to ensure proper data transmission.
Step One: Open the web management page of the Print Server
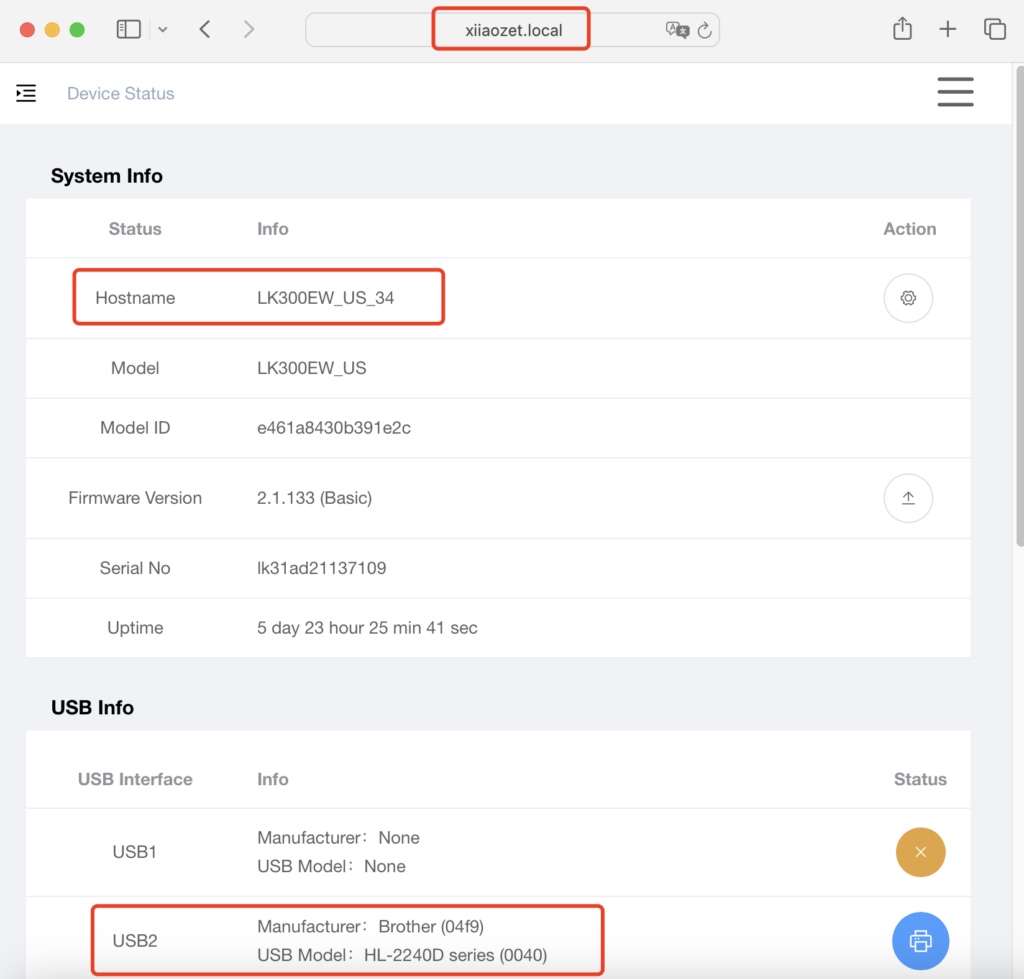
After configuring the network for print server, open your browser and enter the following address: xiiaozet.local, enter to access the print server’s Web Management Page. Default Password: admin.
On the Web Management Page, you can find important details such as the Hostname, IP Address, and the USB Port where the printer is connected.
Step Two: Adding the Printer
1. For Windows 10 and earlier systems, open the control panel, navigate to “Devices and Printers,” click “Add a printer,” and then click “The printer I want isn’t listed.”
Note: For Windows 11, go to the system “Settings,” click “Bluetooth & Devices,” then select “Printers & scanners,” click “Add device,” choose “The printer I want isn’t listed,” and then click “Add a printer manually”

2.Choose to manually add a local printer or network printer, and click “Next.”

3.Select to create a new port, choose Standard TCP/IP Port, and click “Next.”

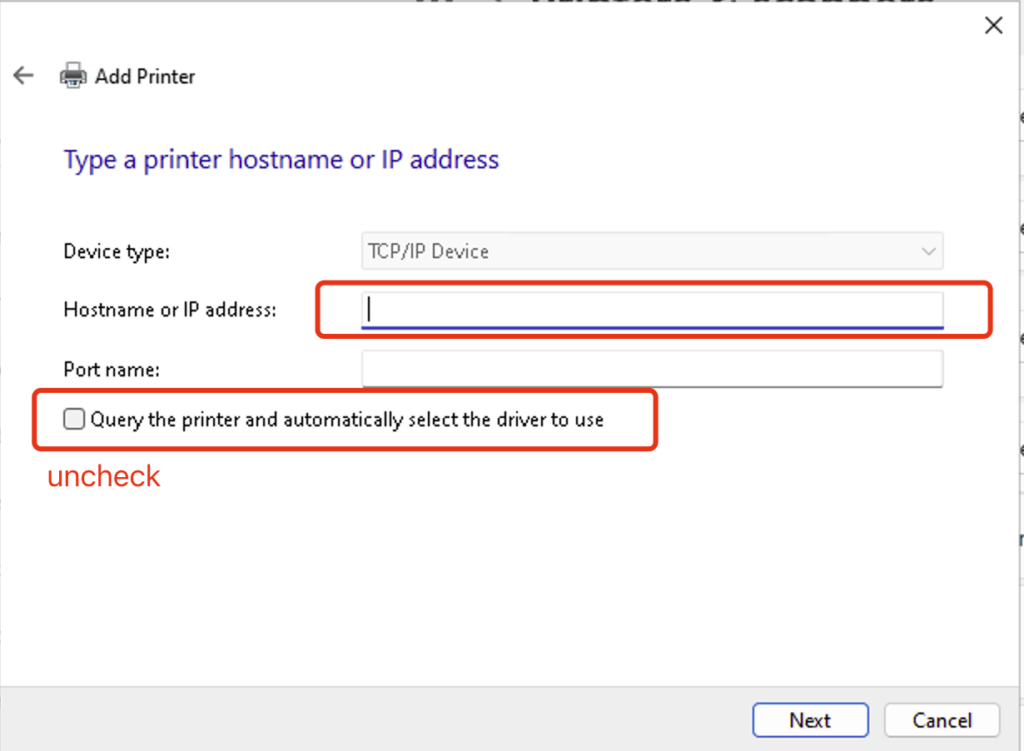
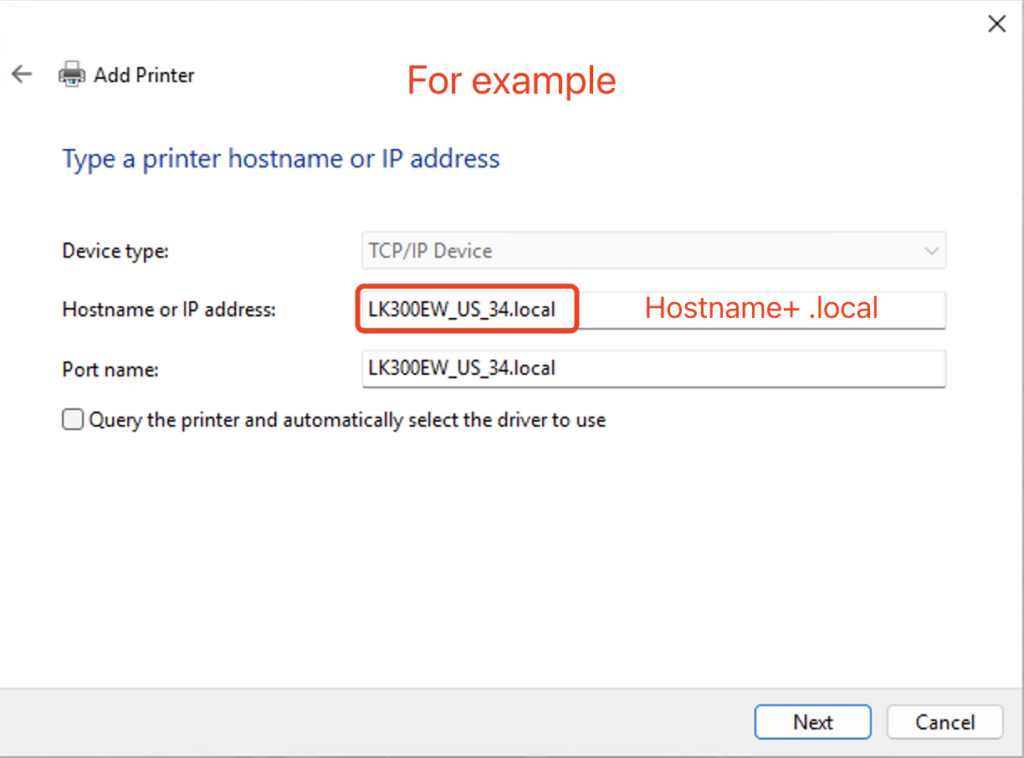
4.①Input the Hostname followed by .local (e.g., LK300EW_US_34.local) in the Hostname or IP address box.
②Customize the port name (optional)
③Uncheck “Query the printer and automatically select the driver to use,” and then click “Next.”
5.Wait for the detection of the TCP/IP port, approximately 1 minute.

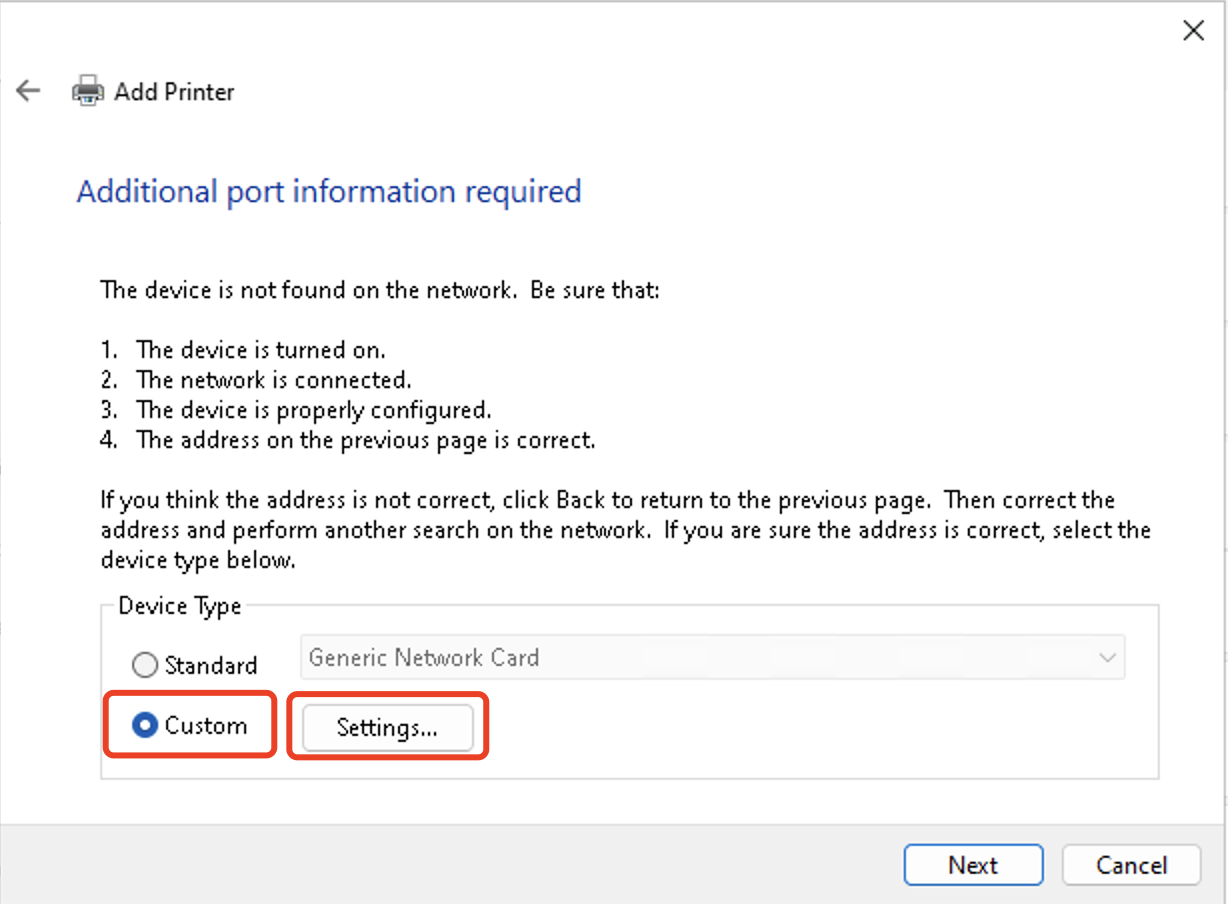
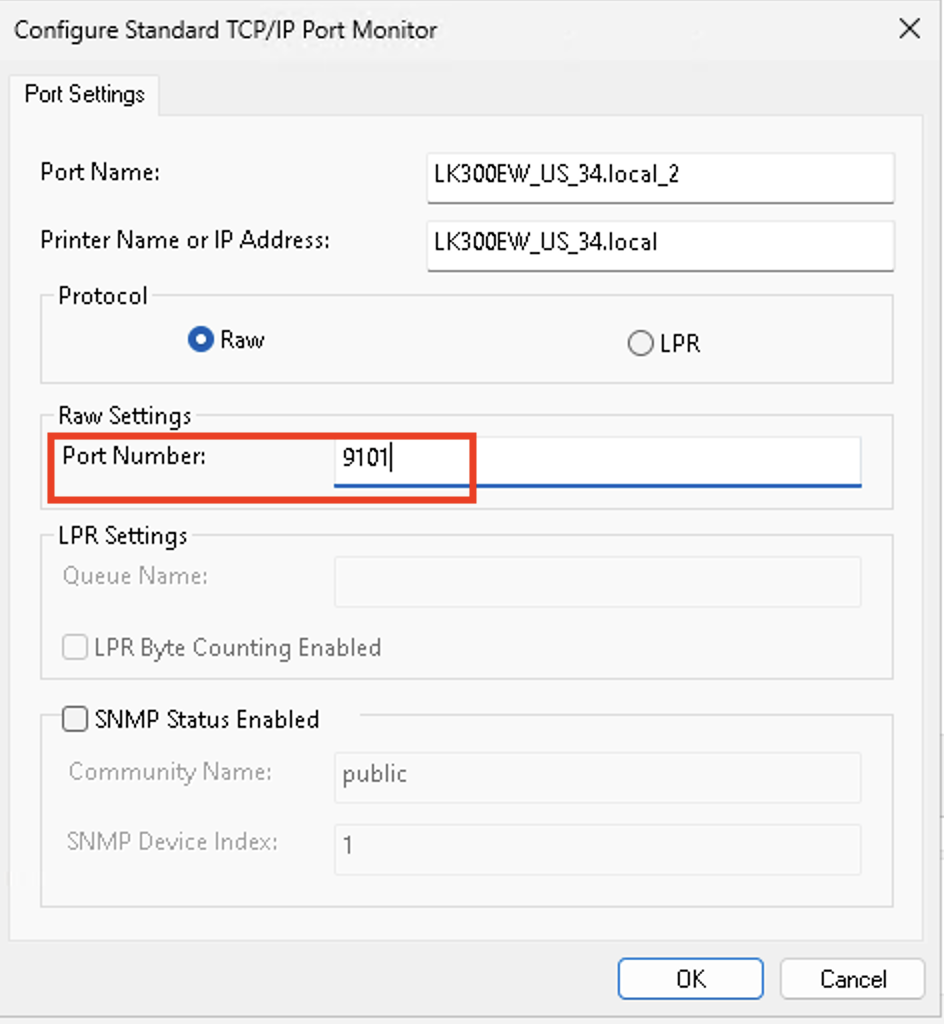
6.Choose “Custom,” and click “Setting” to check the Port Number. Ensure that you select the USB port where the printer is connected as identified on the Web Management Page.
- USB1:
9100 - USB2:
9101 - USB3:
9102
7.If the computer previously installed the printer driver, select the brand and model of the printer from the list, and click “Next.”

Note: If the printer model cannot be found, it means that the printer driver has not been installed on the computer, please download and install the printer driver on the computer before adding the printer.
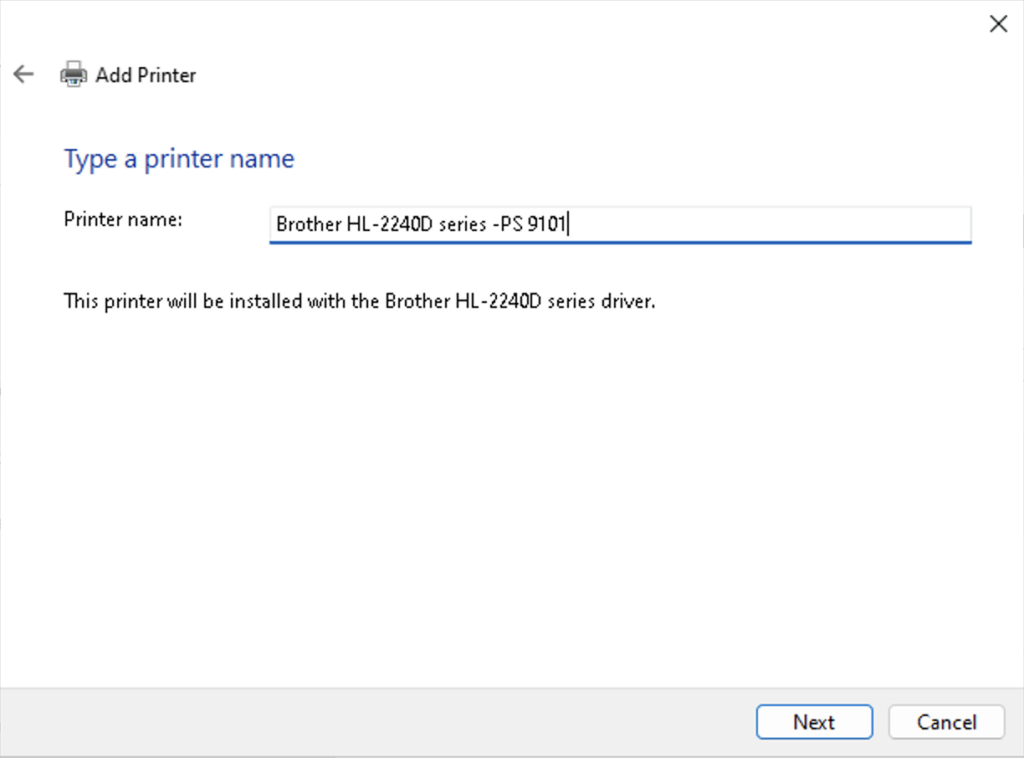
8.Optionally, customize the name of the printer, and click “Next.” It is recommended to include terms like “Print Server” in the printer name to easily identify it and avoid selecting the wrong printer when sending print jobs.
9.After completing the addition, print a test page to verify the settings. If the test page prints successfully, click “Finish,” indicating successful addition of the printer.
If printing a test page is unsuccessful, remove the added printer from your computer. Then, re-add the printer following the steps above, ensuring each step is correctly completed.

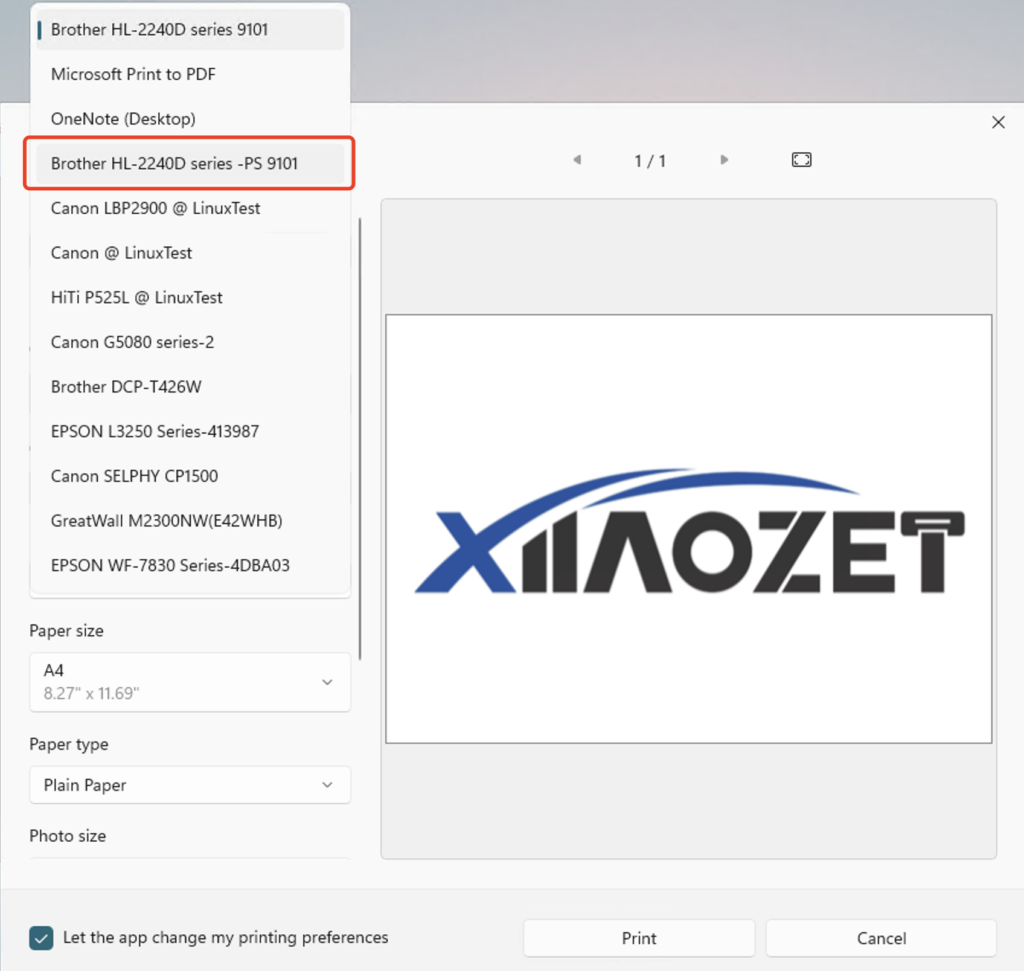
10. Important !!! When sending a print job, make sure to select the newly added printer by its name.