Step2: How to Add Printer to Computer Manually via IP Address (Mac)
This document provides a detailed guide on how to configure a print server via ip address on a Mac. It assumes you have already completed the network configuration of the print server. If not, please refer to the relevant network configuration guide first.
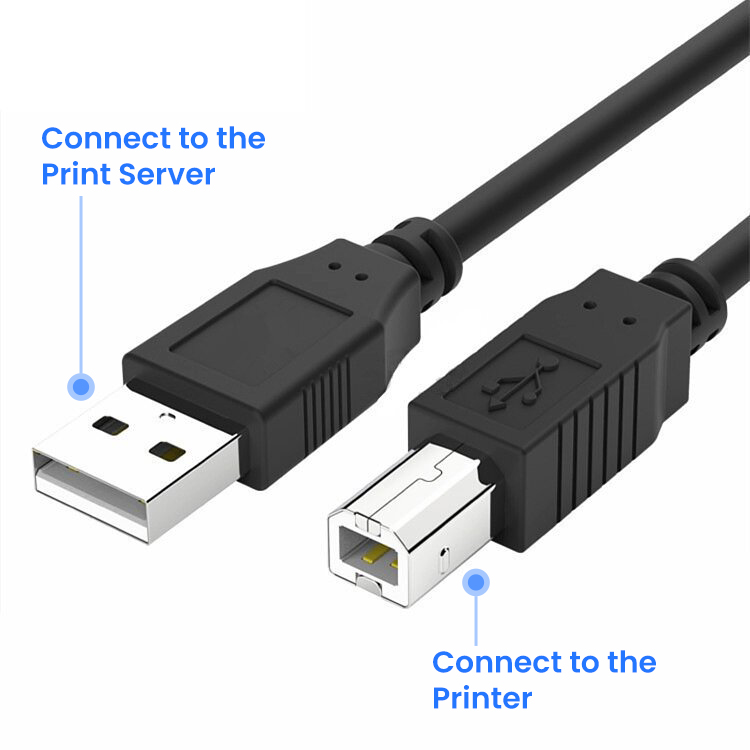
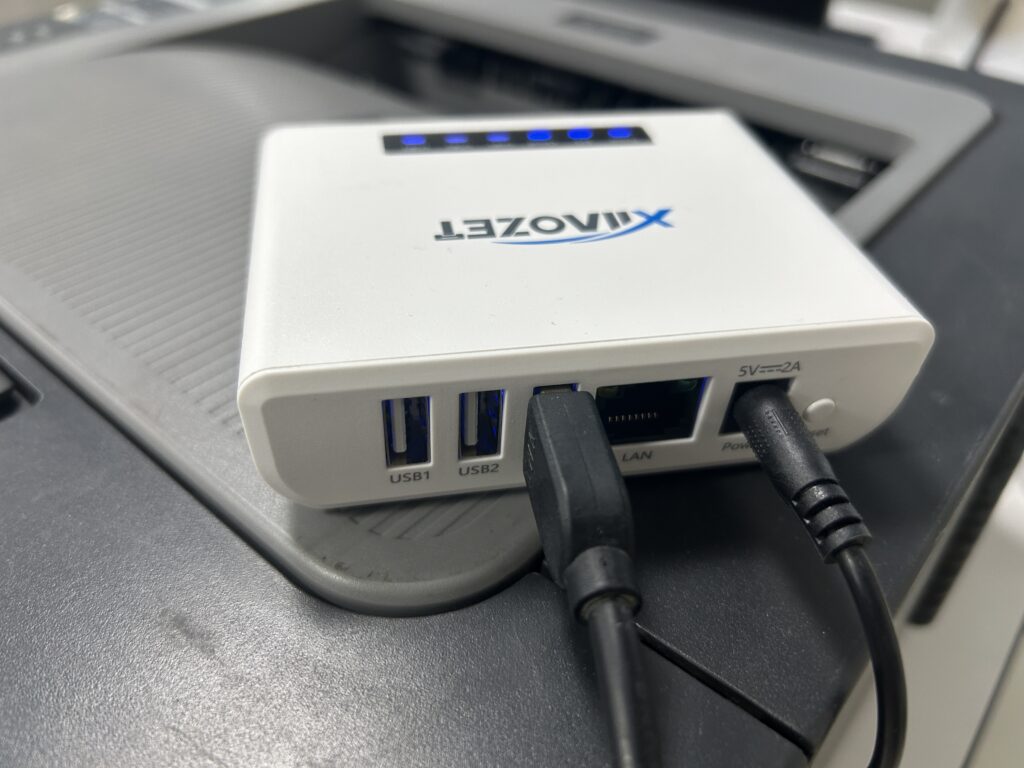
💡Important Tip: Connect the USB Printer Properly
Please connect the USB cable of your printer to the USB port of the print server.
Make sure the square end (Type-B) is plugged into the printer, and the flat end (Type-A) is plugged into the print server.
This step is crucial to ensure proper data transmission.
Step One: Install the Printer Driver
Before adding the printer, ensure that you have installed the appropriate printer driver on your Mac. It’s crucial to check if your printer has drivers that work with macOS. If it doesn’t, you won’t be able to add it. You can usually find the latest drivers on the printer manufacturer’s website.
Step Two: Open the web management page of the Print Server
After configuring the network for print server, open your browser and enter the following address: xiiaozet.local, enter to access the print server’s Web Management Page.
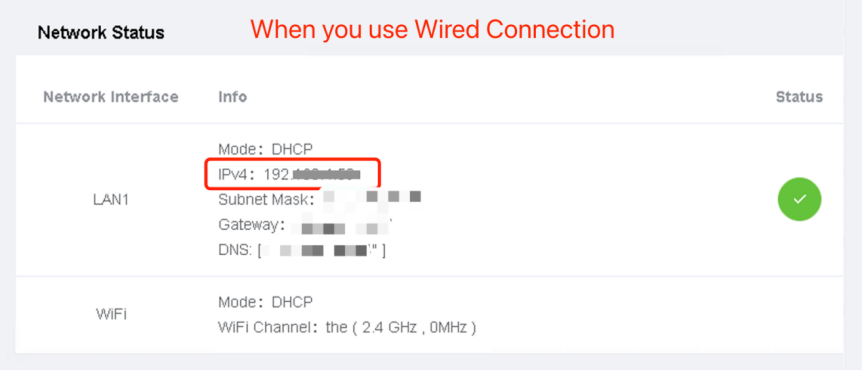
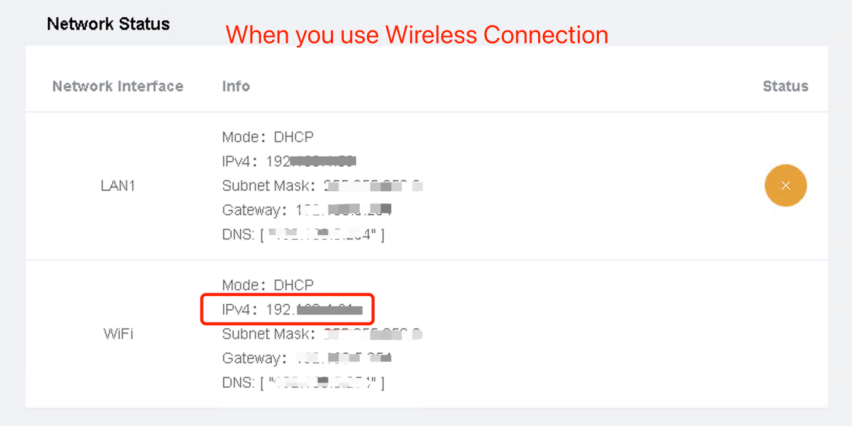
On the Web Management Page, you can find important details such as the Hostname, IP Address, and the USB Port where the printer is connected.
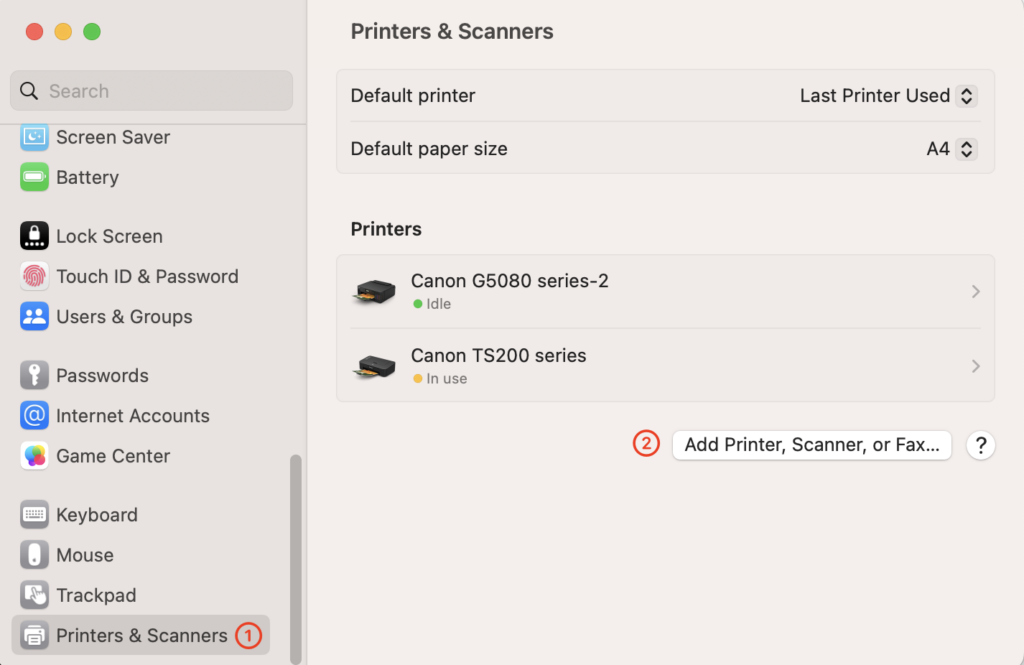
Step Three: Open “Printers & Scanners” Settings
- Click the Apple icon in the top-left corner of the screen and select “System Preferences.”
- In the System Preferences window, find and click “Printers & Scanners.” In the “Printers & Scanners” window, click the “Add Printer, Scanner, or Fax…” button at the bottom left to add a new printer.
Step Four: Add a Printer
In the “Printers & Scanners” window, click the “Add Printer, Scanner, or Fax…” button at the bottom left to add a new printer.
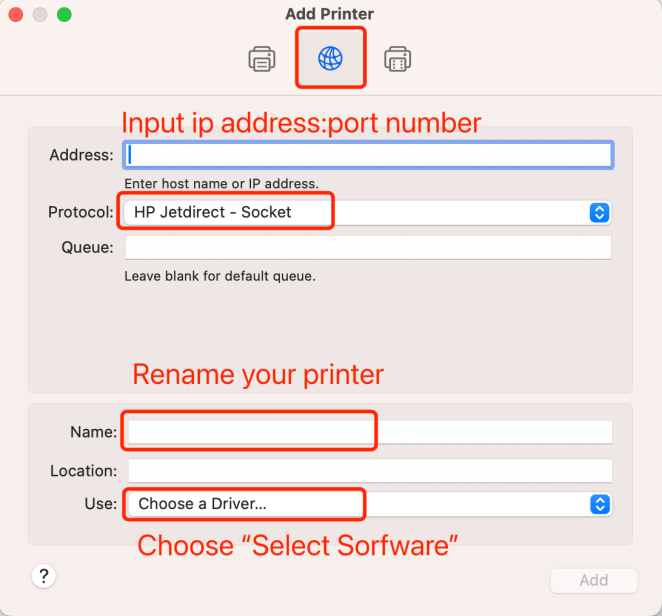
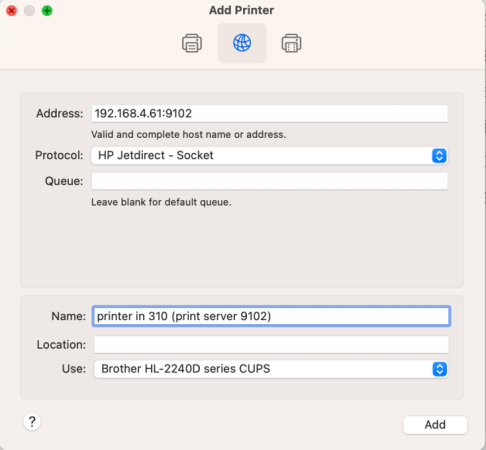
Step Five: Configure the IP Printer
- From the pop-up menu, select “Add IP Printer.”
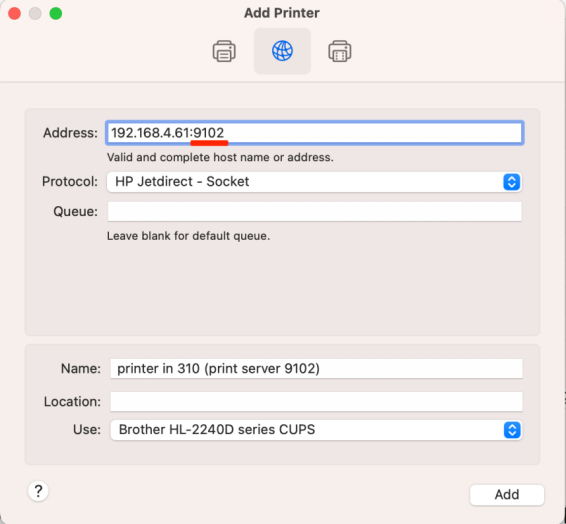
- In the “Address” field, enter the print server and port number of the print server, (for example:192.168.4.61)
- Find the ip address of your print server on the web management page (Refer to Step Two).
- For the LK300W and LK300EW models, use the corresponding port number based on which port the printer is plugged into on the print server:
- USB1:
9100192.168.4.61:9100) - USB2:
9101(e.g.,192.168.4.61:9101) - USB3:
9102(e.g.,192.168.4.61:9102)
- USB1:
- In the “Protocol” drop-down menu, select “HP Jetdirect – Socket.”
- Note: To avoid sending print jobs to the wrong printer, it is recommended to rename your printer to include ‘print server’.
Note: For the LK300W and LK300EW models, use the correct port number!
Step Six: Select the Printer Driver
- In the “Use” field, click “Select Software…” which will open a new window to choose the printer driver.
- In the driver list, find and select the driver that matches your printer model.
- Note: If the printer model cannot be found, it means that the printer driver has not been installed on the computer. You need to go back to Step One.
- Click the “OK” button to confirm your selection.
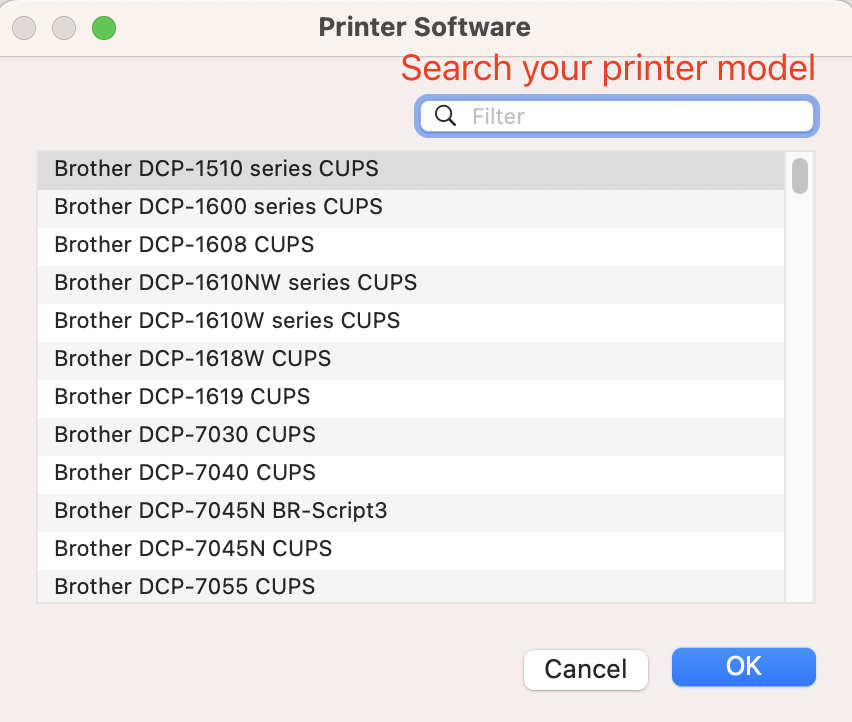
Take brother printer as an example:

Note: It is recommended to include terms like “Print Server” in the printer name to easily identify it and avoid selecting the wrong printer when sending print jobs.
Step Seven: Complete Adding the Printer
- After confirming that all settings are correct, click the “Add” button.
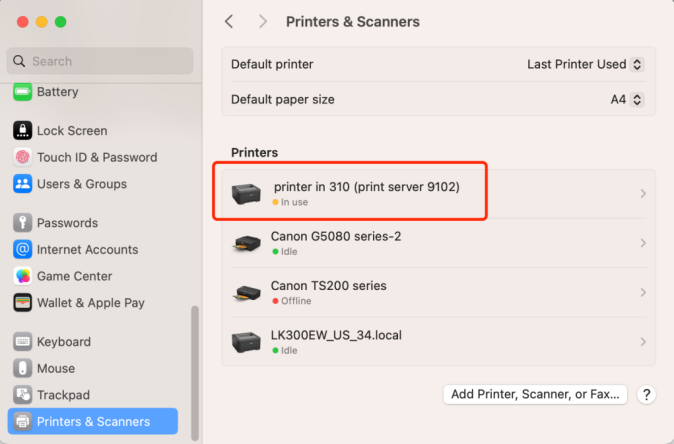
- Once added successfully, the newly added printer will appear in the “Printers & Scanners” list.
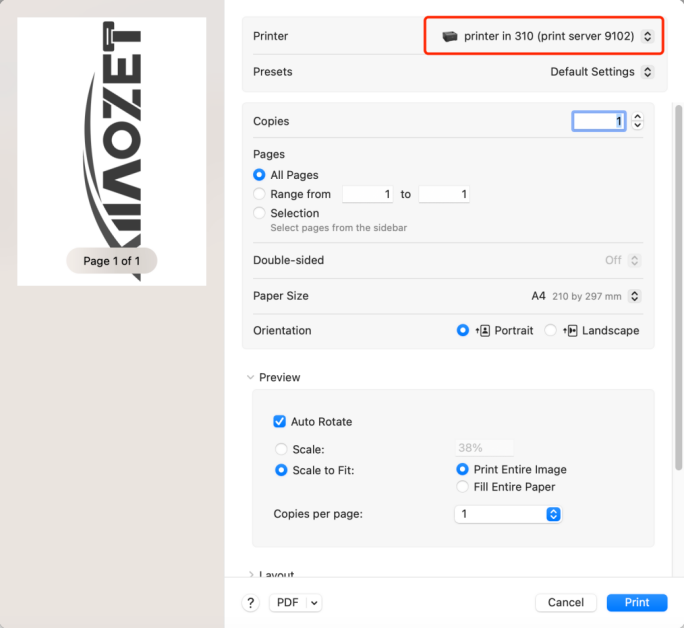
Step Eight: Send a print job to the printer
Important !!! When sending a print job, make sure to select the newly added printer by its name.
Notes
- Ensure that both the print server and the Mac are on the same network.
- If you cannot find the appropriate driver when selecting the software, visit the printer manufacturer’s website to download the latest driver.
- Note: LK100EW/ LK300EW Model: If the above steps do not resolve your issue, please use the Virtual USB Connection Tool to connect to the printer. Click the tutorial.
Common Issues and Solutions
This issue may be due to an incorrect port being entered when adding the printer. Please verify the port settings: USB1: 9100, USB2: 9101, USB3: 9102. Try removing and re-adding the printer, ensuring the address is entered correctly. After successfully adding the printer, try printing again.
- Ping the Print Server: On your Mac, open the “Terminal” and ping the print server’s hostname (the hostname can be found on the back of the print server). This will help determine if your computer can communicate with the print server.
- Check Printer Address: Ensure that when adding the printer, you correctly input the hostname in the “Address” field. Verify that the underscores are correct and that
.localis added at the end. If you are using a print server with three ports, ensure the correct port name is entered. - Network Connection: Make sure your computer is connected to the same local network as the print server.
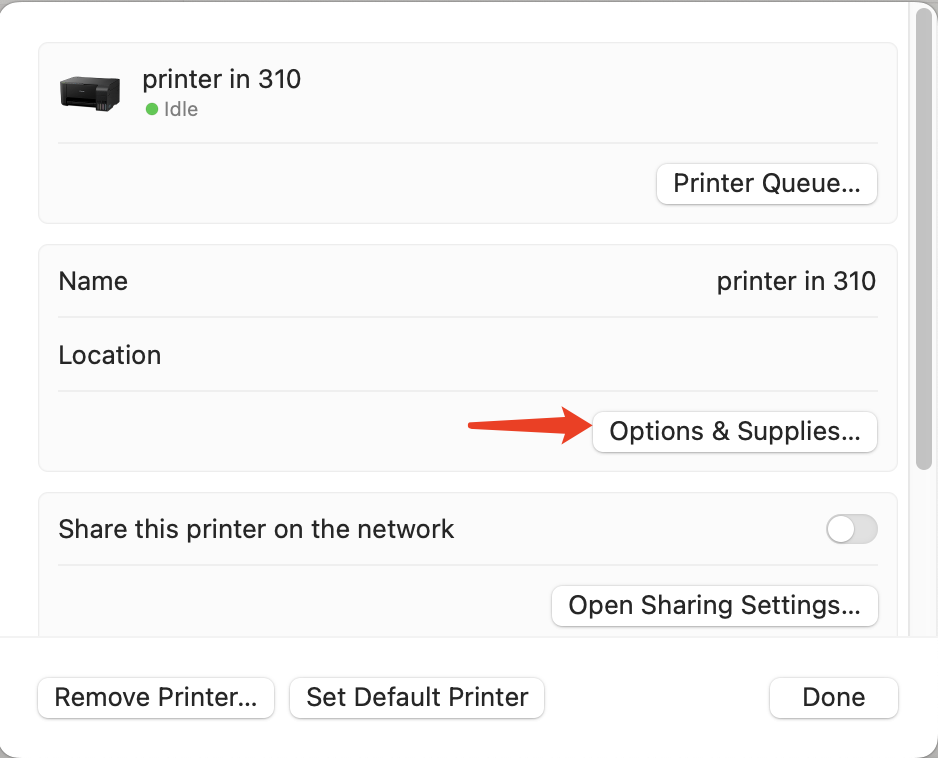
If your Epson printer is correctly installed but still cannot print, please check and disable bidirectional communication. Follow the steps below:
Step 1: Check Bidirectional Communication Settings
- Open System Preferences > Printers & Scanners (Mac)
- Locate your Epson printer in the printer list and right-click to select Printer Properties (Windows) or click Options & Supplies (Mac).
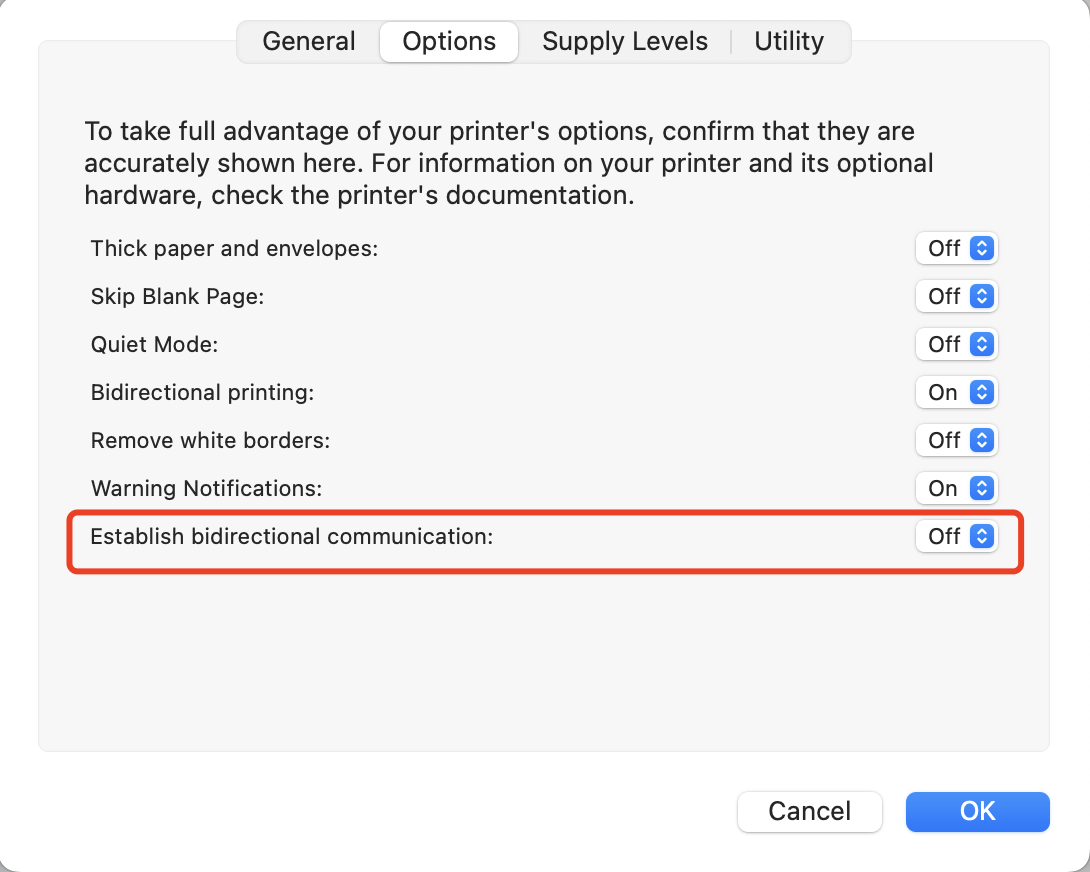
- Go to the Options tab and find Establish bidirectional communication.
- Set Establish bidirectional communication to Off (Disabled).
- Click OK or Apply to save the changes.
Step 2: Try Printing Again
After applying the changes, try printing again.
If the issue persists or you have any question, please contact us and provide a screenshot of any error messages to our technical support team via Live Chat or support@xiiaozet.net.
Clear!