Step2: LK100EW / LK300EW to Share USB Device Over Network User Guide (on Mac)
This document provides a detailed guide on how to use the Virtual USB Tool to enable USB device connectivity over the network for LK100EW and LK300EW print server models.
Principle Explanation
Connecting a Printer or Scanner
This solution is applicable to all printers and scanners.
Some printers, such as Canon’s LBP series (which use the CAPT language) and certain Ricoh models (which use the DDST language), do not support Windows’ built-in TCP/IP protocol for shared printing. To enable multiple computers to share these printers, virtual USB Connect Tool is required.
You can think of the virtual USB connection tool as simulating the plugging and unplugging of the printer’s USB cable via software. When connected, it functions as if the printer is directly connected to your computer, eliminating the need for any physical intervention.
Connecting Other USB Devices
The virtual USB connection tool can also be used for other USB devices. It simulates the plugging and unplugging of the device’s USB cable through software. When connected, it works just like the device is directly connected to your computer, without the need for physical interaction.
Due to the low-power design, it does not support high power-consuming device without an independent power supply.
Prerequisites
- Ensure the print server is configured on the network, the cloud indictor light is always on.
- Install the drivers for any USB devices you want to connect on your computer.
- Download and install the Virtual USB Connect Tool.
Steps to Use the Virtual USB Tool on Mac
Connecting a Printer or Scanner
(Important!) Before using the tool, ensure the printer or scanner driver is installed on your Mac. You can find the appropriate drivers on the official website of the printer or scanner brand.
- Run the “Virtual USB Client” software after installation.
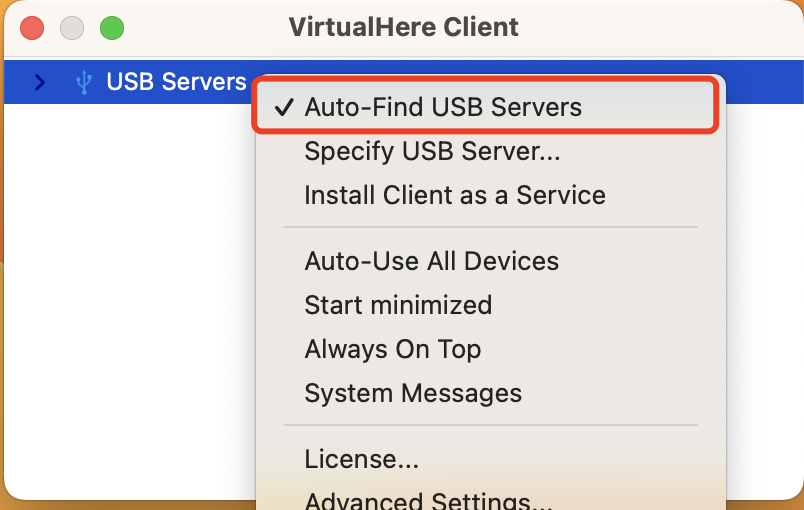
- Right-click and select “Auto-Find USB Servers” to display the print servers available on your local network.
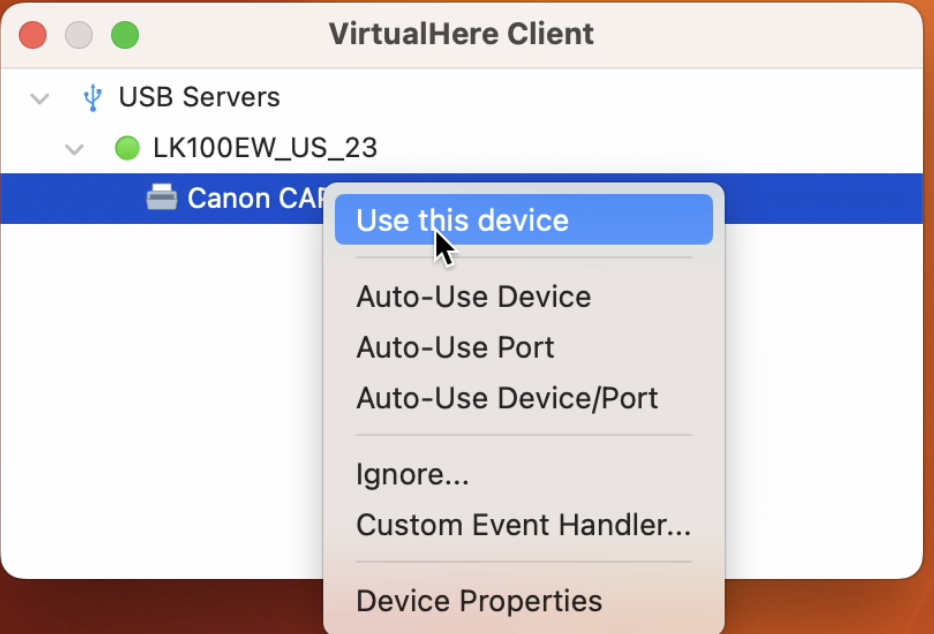
- Select the printer or scanner you wish to connect to. Right-click on the device and choose “Use this device”. This action simulates a virtual connection between your printer or scanner and the computer.
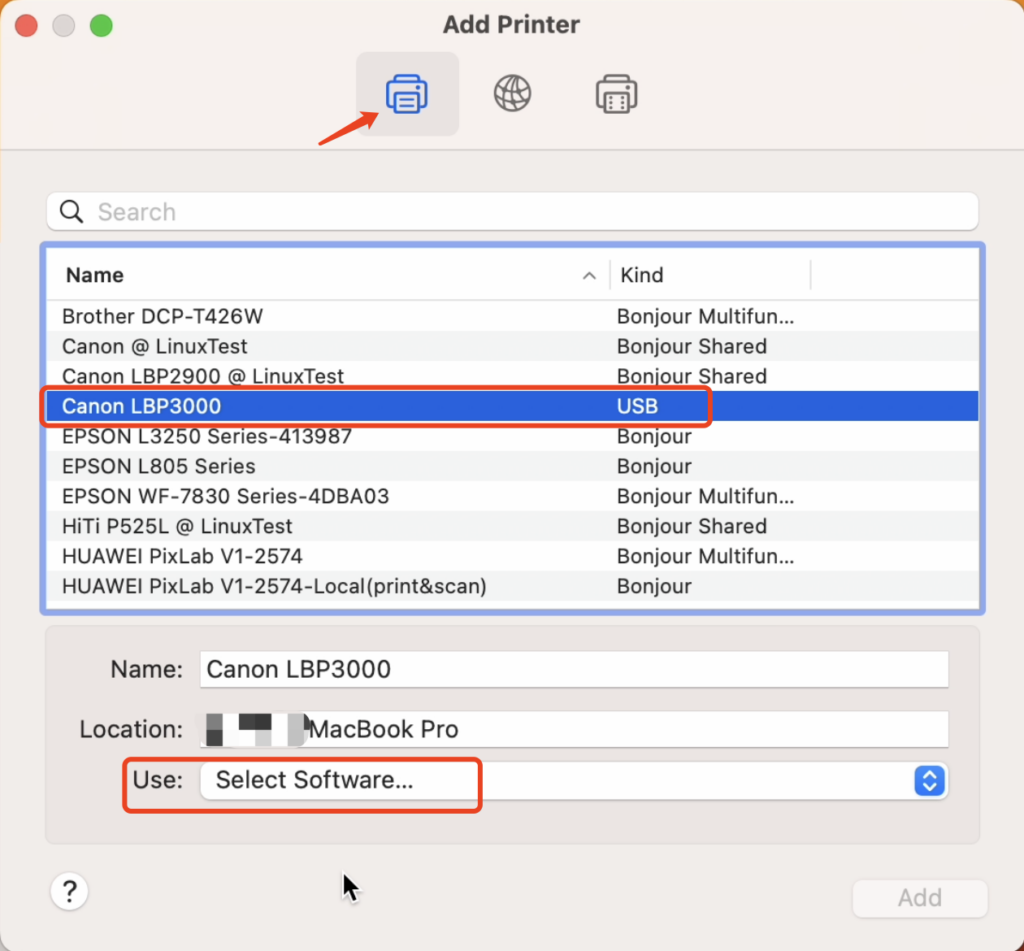
- Add the printer or scanner on your Mac by going to System Preferences > Printers & Scanners. Click Add Printer or Scanner, and you should see the connected device listed under Local Printers.
- In the Use box, select the corresponding driver. (If the driver is not found, it means the printer or scanner driver was not installed correctly. Please reinstall it.)
- Click Add.
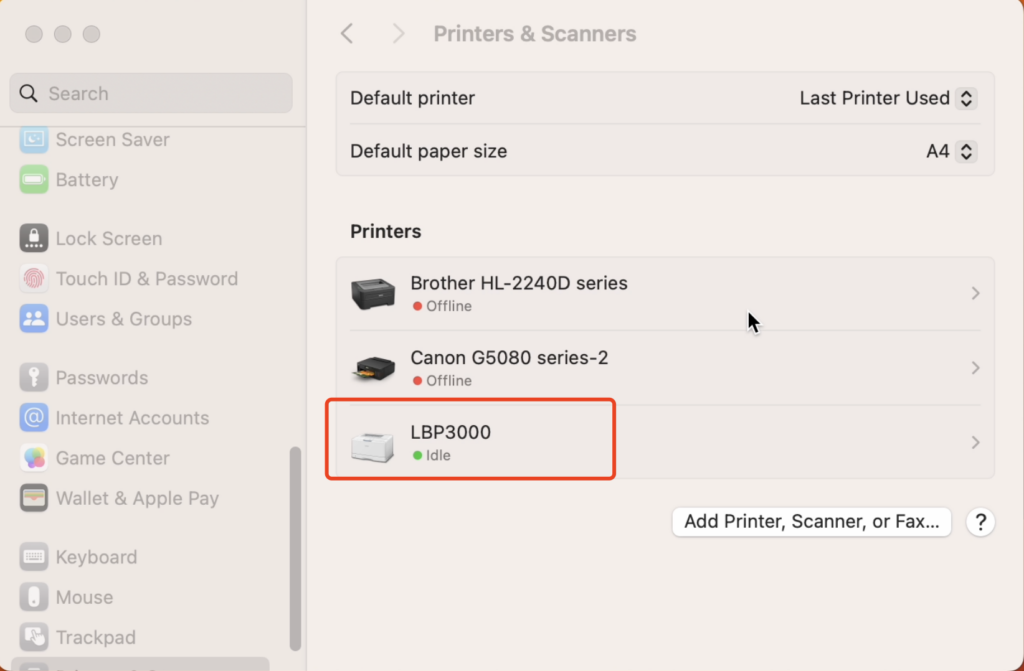
- After successful addition, the printer or scanner will appear in the printer list.
- When printing, simply choose the corresponding printer from the list.
- To disconnect, right-click on the software interface and choose “Stop USB this device”. The printer or scanner will show as Offline.
Connecting Other USB Devices
- Run the “Virtual USB Client” software after installation.
- Right-click and select “Auto-Find USB Servers” to display the USB servers available on your local network.
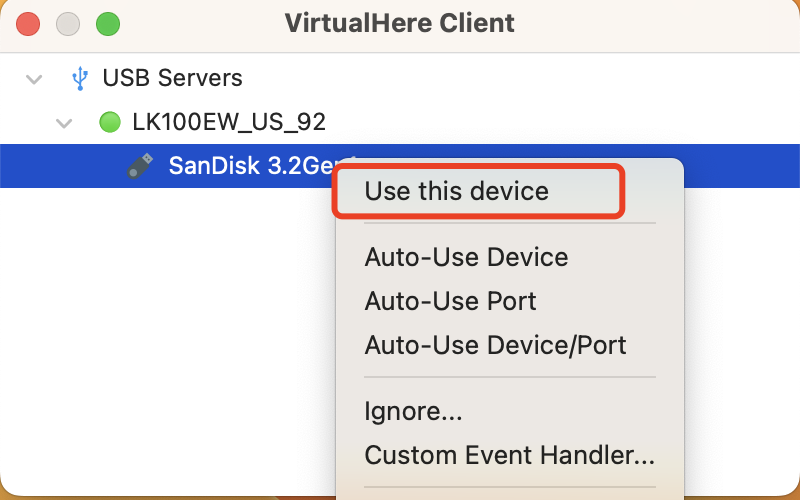
- Select the USB device you wish to connect to. Right-click on the device and choose “Use this device”. This action simulates a virtual connection between your printer or scanner and the computer.
- To disconnect, right-click on the software interface and choose “Stop USB this device”.
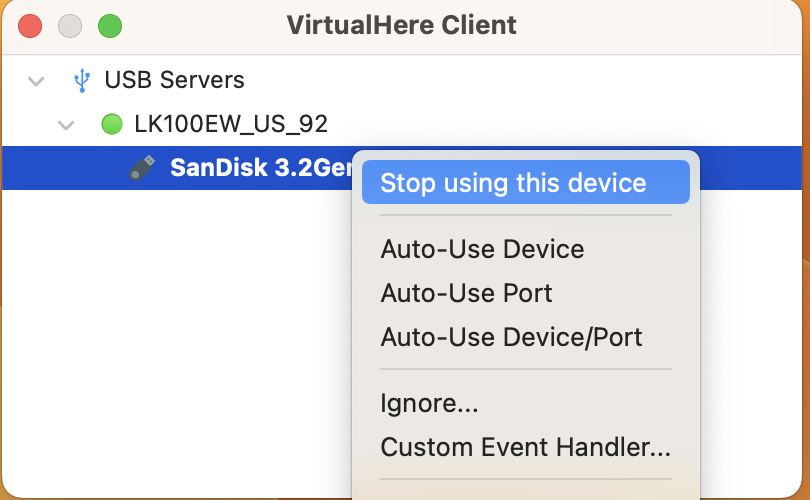
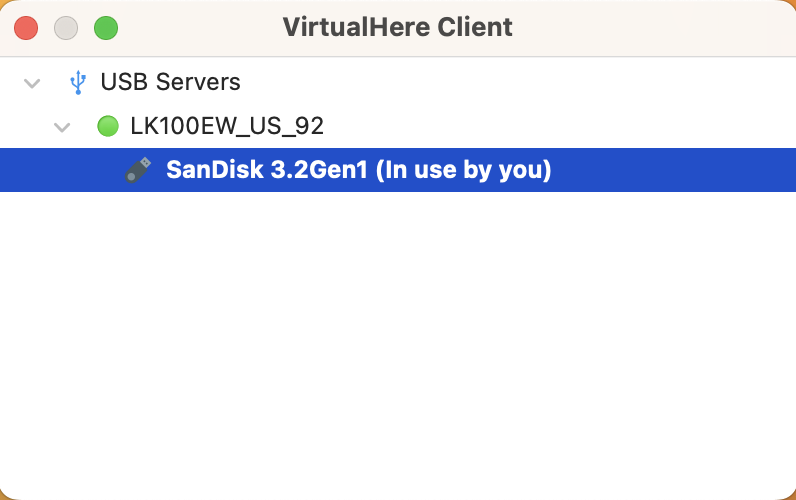
In the software list, select the USB device and right-click to connect. The status will change to “in use by you” once successful. After use, right-click and select “Stop using this device”.
Common Issues and Solutions
- Check “Auto-Find USB Device” several times to detect the print server.
- Right-click on “USB Server“, then select “Specify USB Server” from the menu. In the pop-up window, click “Add“. In the input box, replace “server” with the hostname of the print server. (eg: lk300ew_us_34.local:7575). Click “OK” to complete the addition of the USB device.
- Check Network Connection: Ensure that both the print server and computer are on the same network.
- Firewall Settings: Verify that any firewall or security software on your computer is not blocking the Virtual USB Connect Client. Add an exception if necessary.
- Server Status: Make sure the print server is running and the USB device is connected to the server correctly.
- Update Software: Ensure that both the Client are updated to the latest version.
- Reboot Devices: Sometimes, simply rebooting both the print server and the client can resolve connection issues.
- Driver Installation: Make sure the necessary drivers for the USB device are installed on your macOS system. Download and install drivers from the device manufacturer’s website if needed.
- Reconnect Device: Disconnect and reconnect the USB device within the Virtual USB Client interface.
- Software Permissions: Check that the Virtual USB Client has the necessary permissions to access USB devices in your macOS system preferences.
- Compatibility Check: Verify that the USB device is compatible with macOS. Some devices may have limited or no support for macOS.
- Single User Access: Virtual USB Client allows only one user to access a specific USB device at a time. If multiple users attempt to connect to the same device simultaneously, it will result in disconnections. Ensure only one user is connected to a particular device at any given time.
- Network Stability: Ensure your network connection is stable. Frequent disconnections can be caused by unstable or weak network connections.
The tool should display an icon in the top menu bar after launching. You can right-click that icon to exit the program, as shown in the image. If the icon doesn’t appear, it may not have launched correctly.

I connected the device in the software, but I received the error:
“Error ‘Operation not permitted’ (-1) trying to use this device.”
This issue is usually caused by different software versions installed on the Windows system and the macOS system in a dual-system environment.
Please make sure both Windows and macOS are using the same software version.
If you are using a dual-system setup with both Windows and macOS, please also install the same version of the software on your Windows system. You can download it from here: https://www.xiiaozet.net/download123/1447/?tmstv=1778837965