User Guide- LK301E to Share USB Device Over Local Network
Step 1: Configure Print Server to Connect to the Local Network
Wired Connection
Make sure the router or switch connected to the LK301E USB server has internet access and is in the same local network (LAN) as your computer.
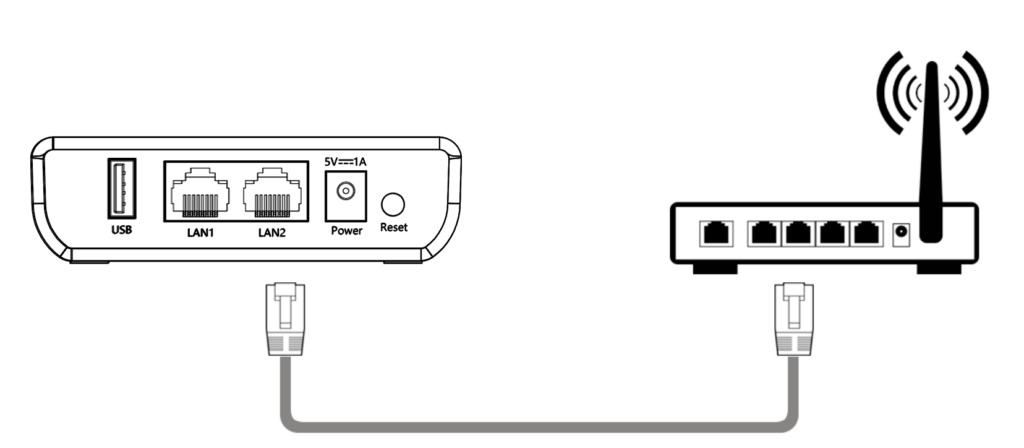
- Connect the USB device to the USB port of the LK301E.
- Connect the network cable from the LAN port of the LK301E to your router or switch.
- The USB server will automatically obtain an IP address assigned by the router via DHCP.
- When the Cloud indicator stays solid, it means the wired network connection is successfully established.
- Note:
If your network does not use DHCP, or if you prefer to assign a static IP to the print server, you’ll need to manually configure the IP settings via the device management page.
- Note:
Step 2: Use the Virtual USB Tool to enable USB device connectivity over the network
Download and install the Virtual USB Connect Tool.
Connecting / Disconnecting to / from a USB device
- Run the “Virtual USB Client” software after installation.
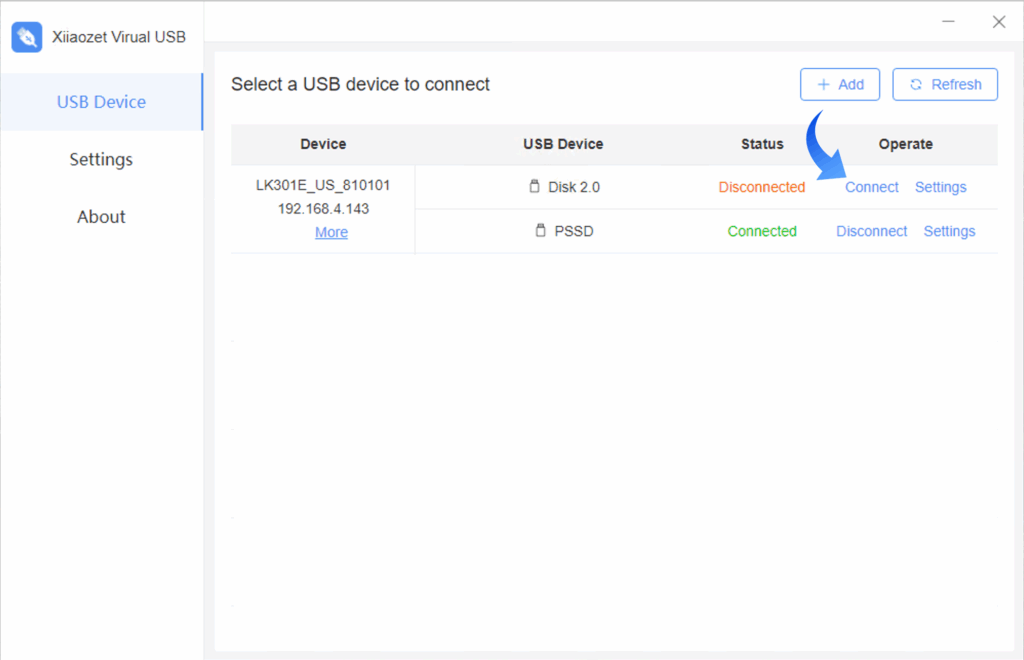
- The software will automatically detect USB servers on the local network and display connected device information.
- Select the USB device you wish to connect to. Click “Connect” to establish a connection. The status will change to “Connected”.
- This action simulates a virtual connection between your USB device and the computer.
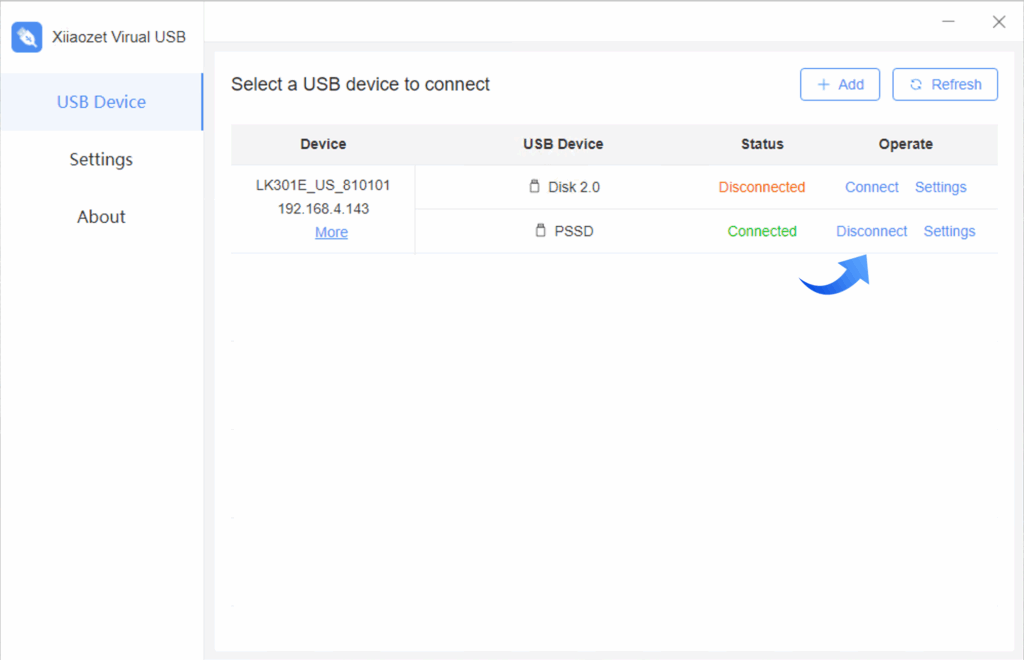
- Disconnect the device (if needed):
- In the tool, click “Disconnect” to release the USB device so that it can be used by another computer.
Important Notes:
- Each USB device can only be connected and controlled by one computer at a time.
- One computer can connect and control up to 3 USB devices simultaneously.
- If another computer needs to use a device, please disconnect it from the current computer first.
- Ensure your computer is on the same local network as the print server to ensure proper discovery and connection.

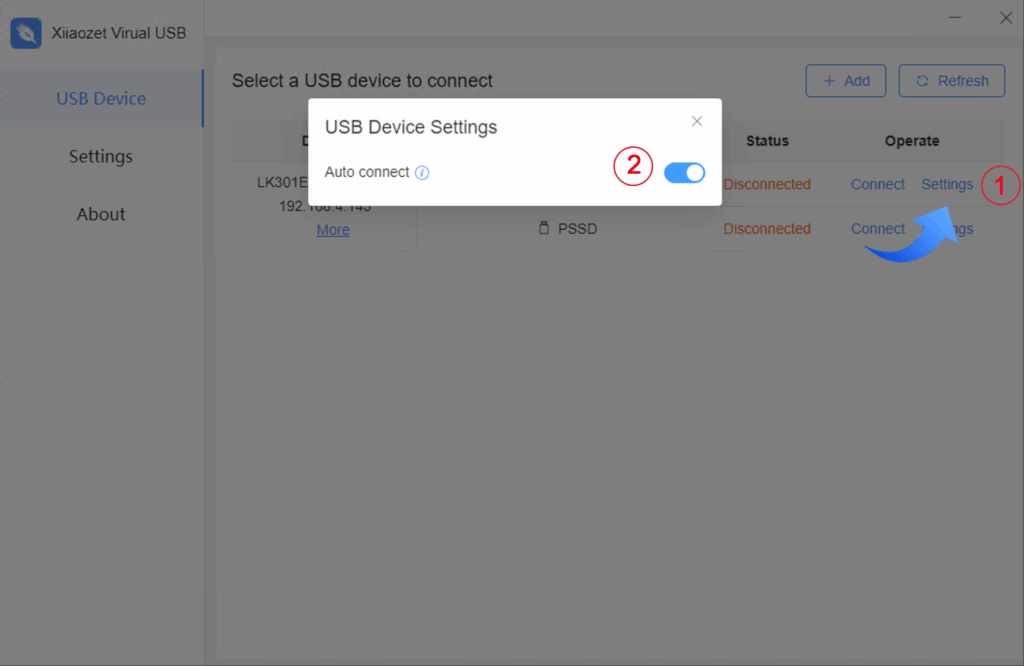
The LK301E shows “Missing VHCI Driver” and refuses to work with Windows or macOS. Is this a hardware defect?
No. This is not a hardware defect of the LK301E.
The message “Missing VHCI Driver” indicates that the Virtual USB (VHCI) driver was not successfully loaded by the operating system. This is usually caused by system security or permission restrictions
If you encounter this message, please try the following:
Run the installer with administrator privileges (right-click and select Run as administrator on Windows)
Allow the driver or system extension when prompted by the OS
Reboot the computer and reconnect the USB device
If the issue persists, please contact our technical support team for step-by-step assistance.