Step2: How to Add Printer to Computer with Quick Installation Tool (Windows)
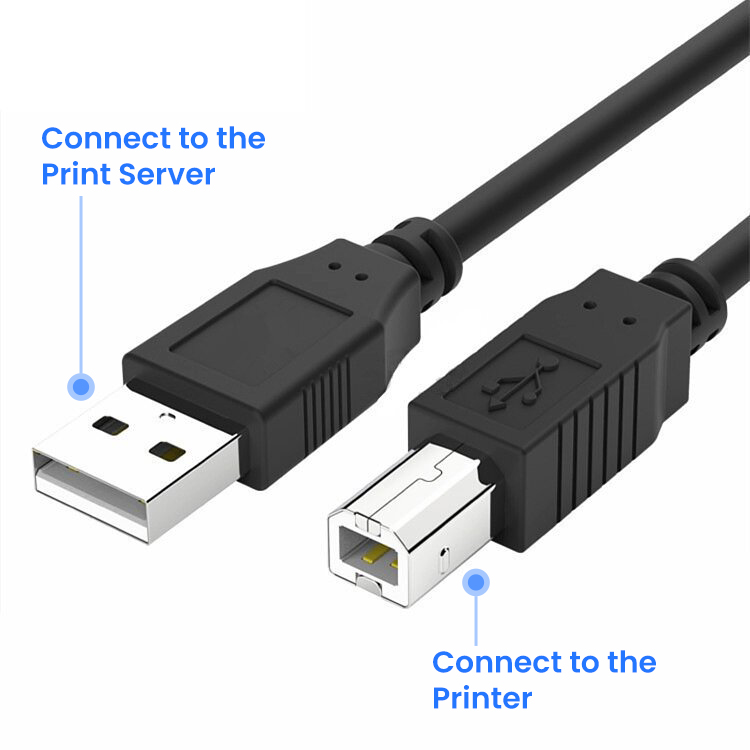
💡Important Tip: Connect the USB Printer Properly
Please connect the USB cable of your printer to the USB port of the print server.
Make sure the square end (Type-B) is plugged into the printer, and the flat end (Type-A) is plugged into the print server.
This step is crucial to ensure proper data transmission.
1. Download and open Quick Installation Tool
Note: if the Quick Installation Tool cannot be downloaded or used, please add the printer manually via IP address or hostname of print server.
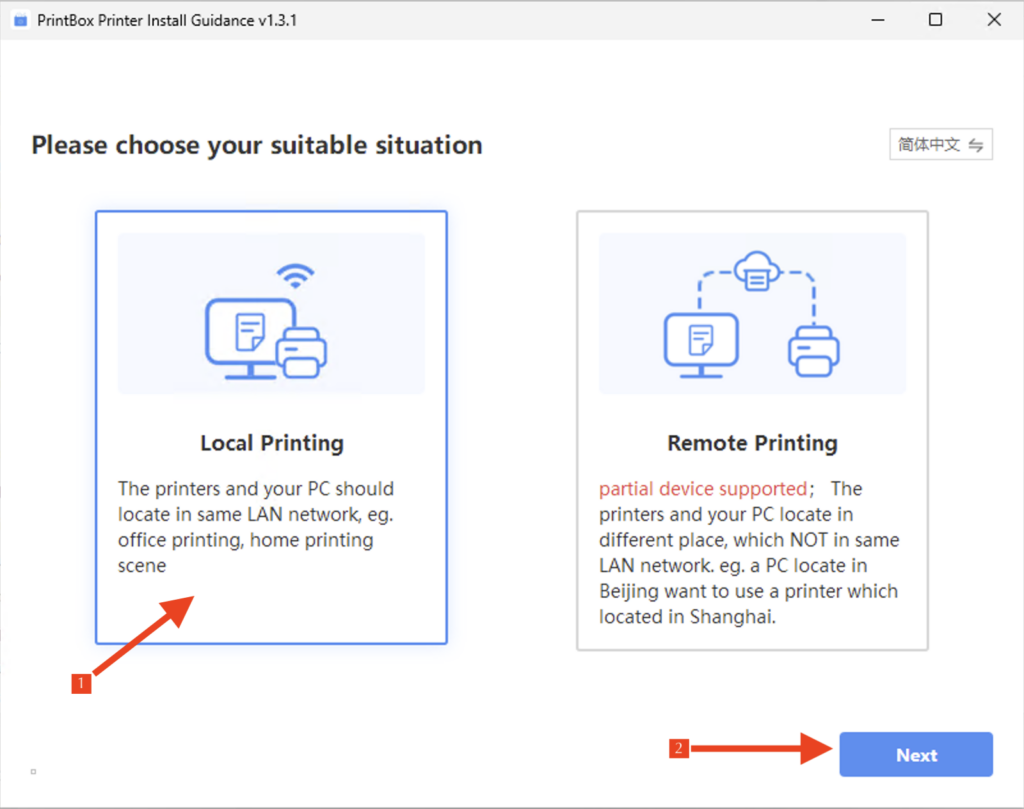
2. Open the installation tool and choose “Local Printing” then proceed by clicking “Next.”
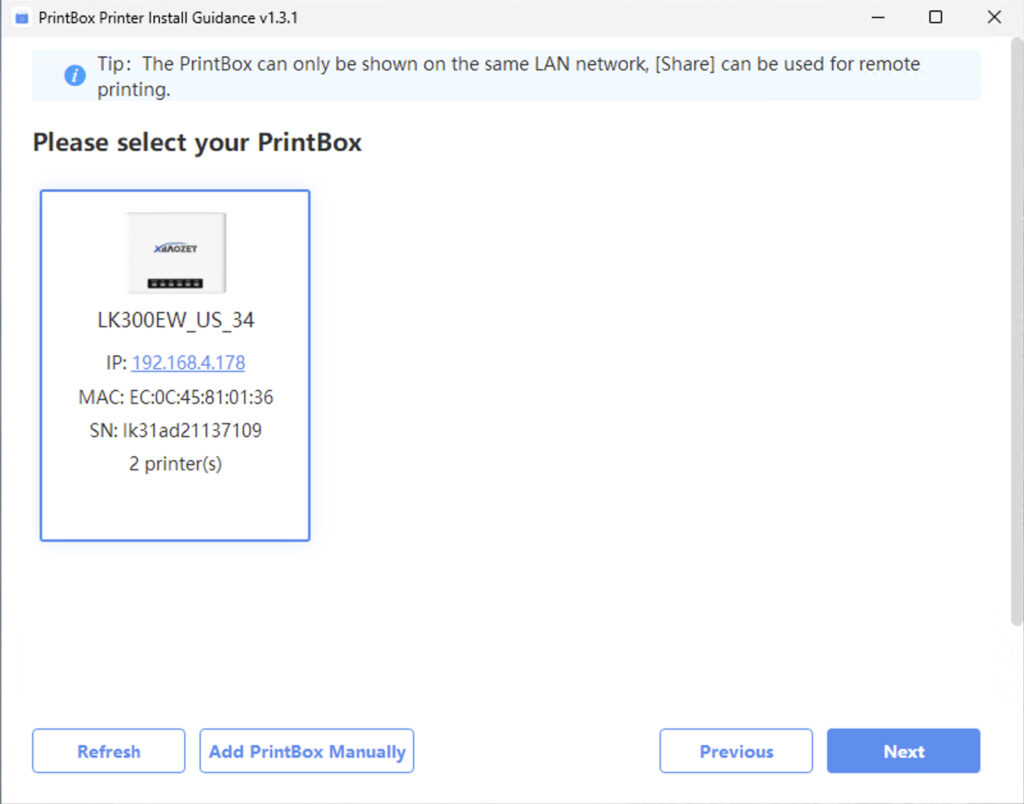
3. The installation tool will search for Xiiaozet print servers in the local network. Choose the print server from the search results and click “Next”.
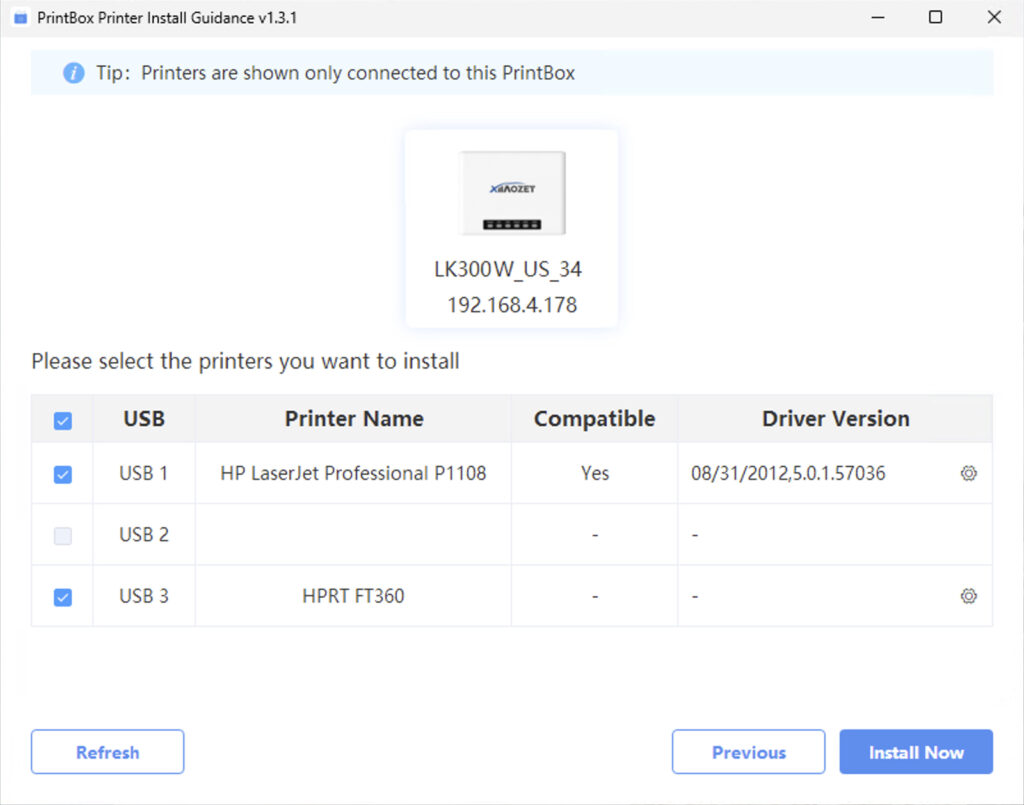
4. The installation tool will automatically identify the printer model of the server, detect and match the corresponding driver, and select the printers for installation. Click “Install Now” for immediate installation.
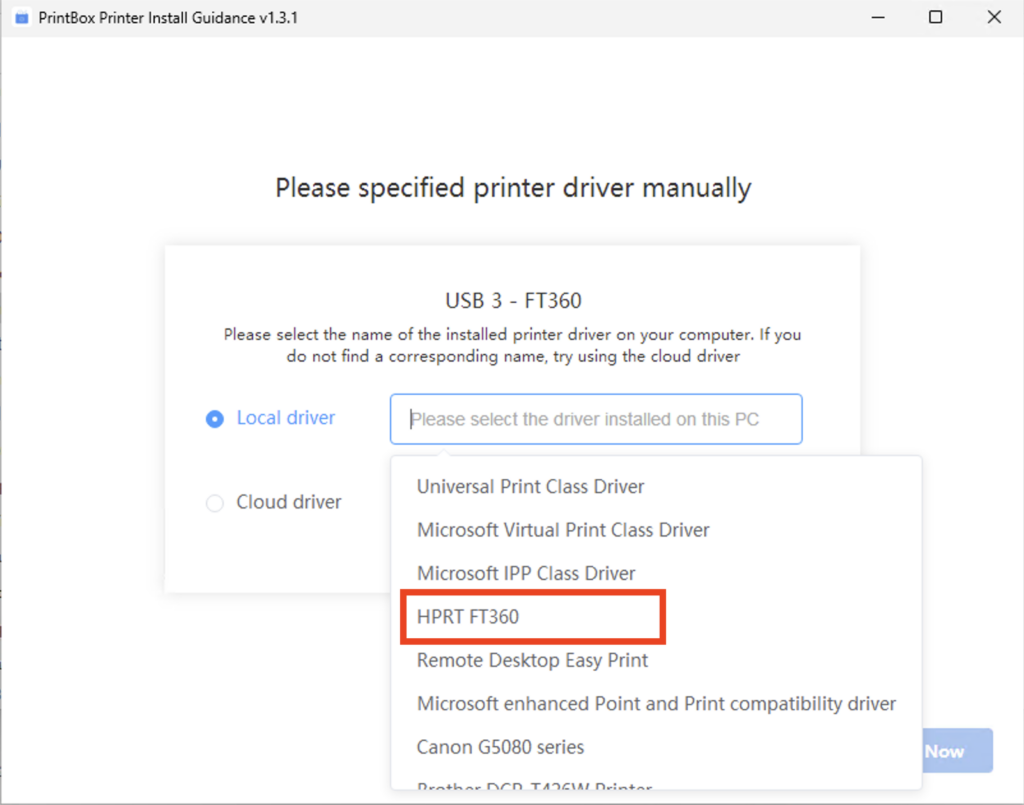
Note: If the installation tool fails to match the appropriate printer driver, it does not necessarily mean that the printer is incompatible; it may be because our database has not yet included the driver for this model. You will need to select a local driver. If there is no driver available locally that matches your printer model, you should visit the official website of the printer brand, download, and install the appropriate driver.
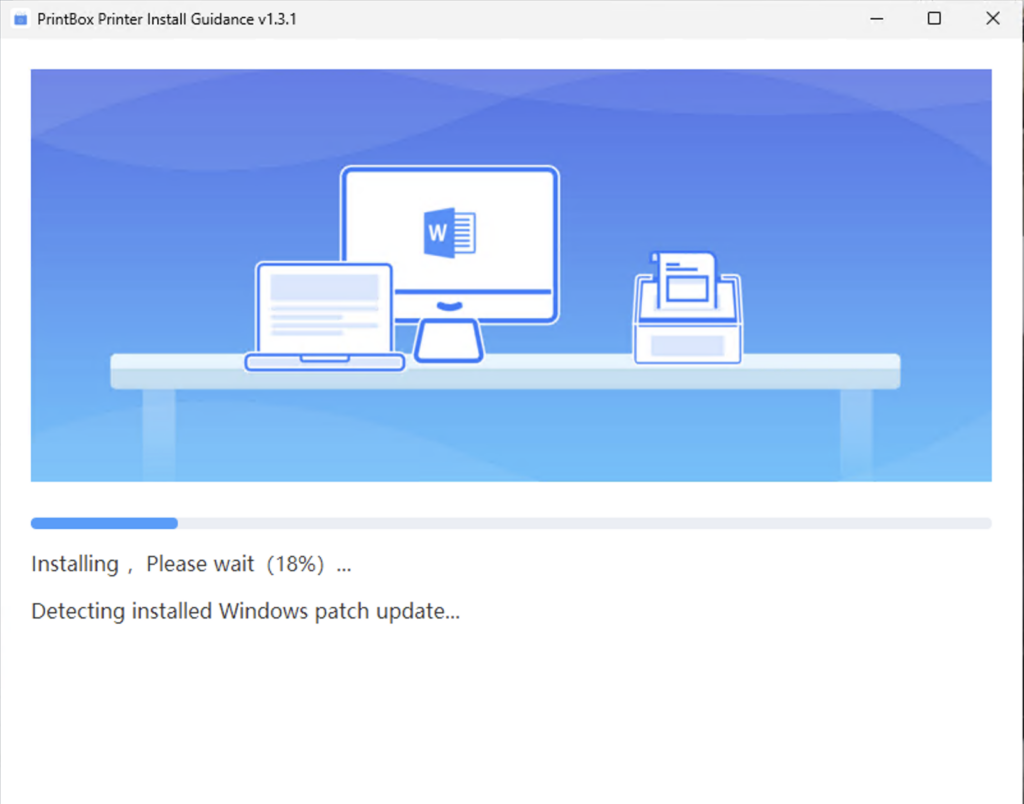
5. The tool will create a TCP/IP port for adding printers, download the necessary printer driver, and proceed with automatic installation.
6. Once the printer addition process is complete, perform a test print. Successful printing of the test page confirms the completion of printer setup.
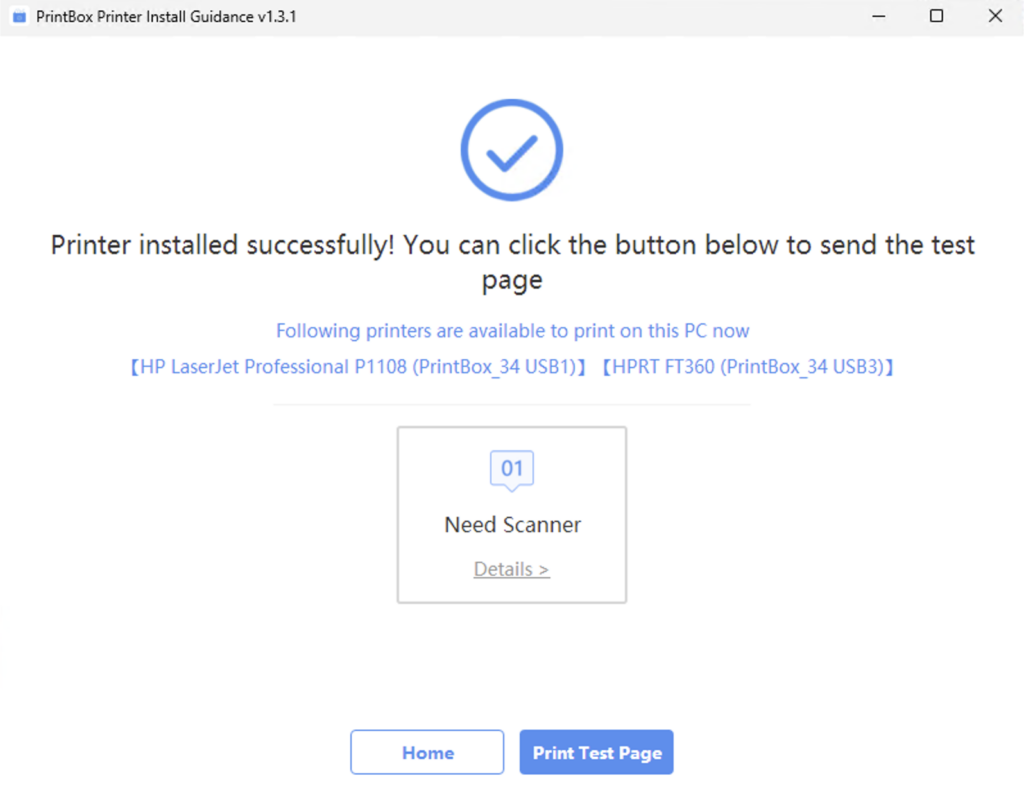
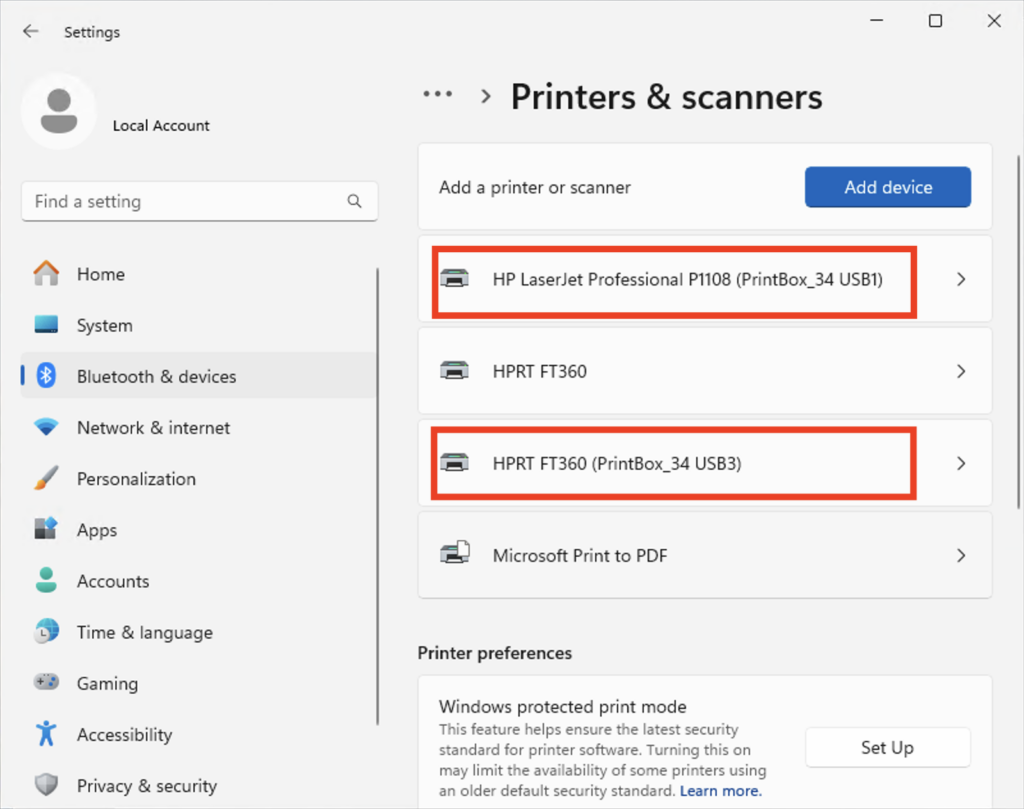
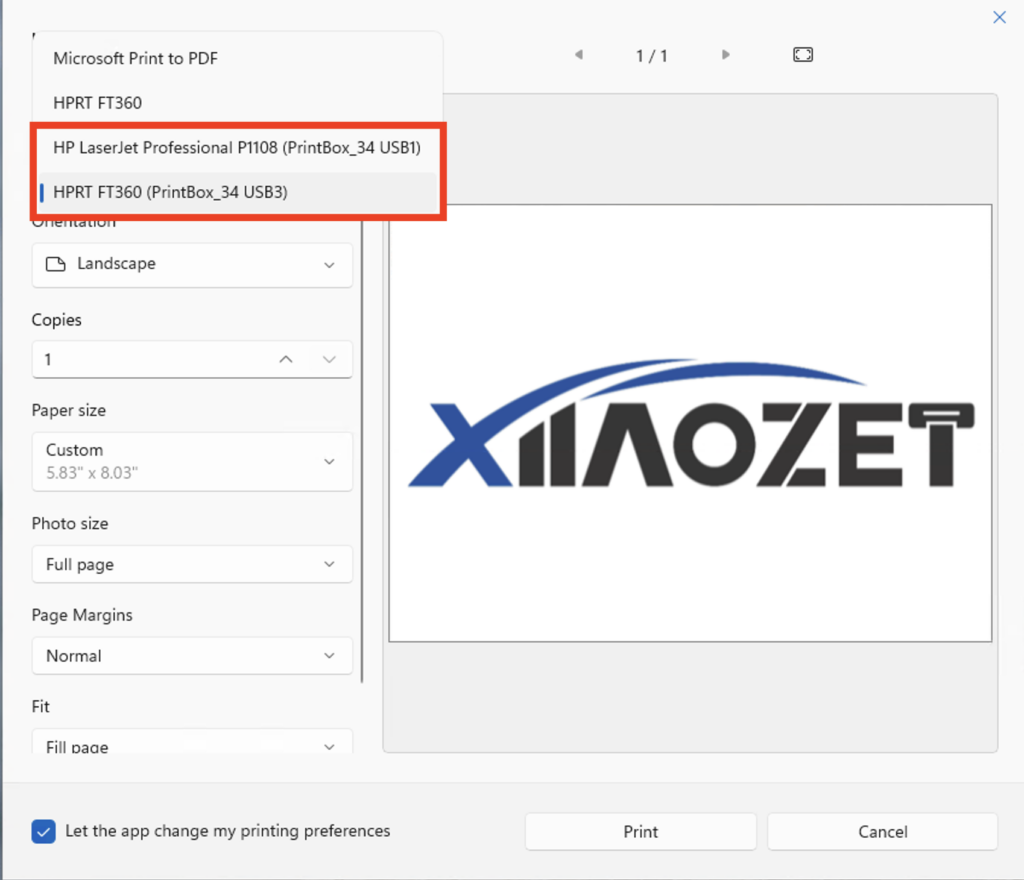
7. After successful installation, the printer will appear in the printer list, with the name followed by ‘PrintBox’.
8. When printing, simply select the corresponding printer to print.
I am impressed. I am using an old Lexmark USB laser printer and found the Xiiaozet LK100EW to be the perfect solution for using this printer. The instructions provided to install the printbox were easy to use and actually worked. Thank you.