User Guide- LK301E to Share USB Device Over Local Network for macOS
Step 1: Configure Print Server to Connect to the Local Network
Wired Connection
Make sure the router or switch connected to the LK301E USB server has internet access and is in the same local network (LAN) as your computer.
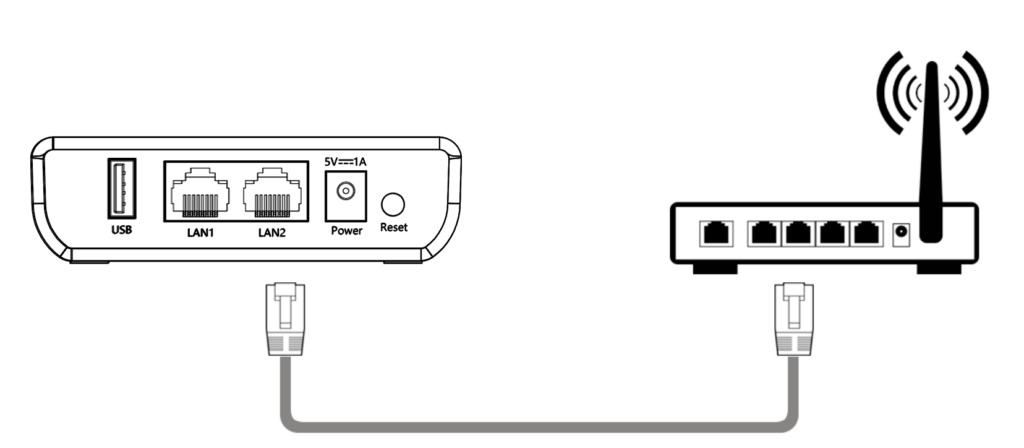
- Connect the USB device to the USB port of the LK301E.
- Connect the network cable from the LAN port of the LK301E to your router or switch.
- The USB server will automatically obtain an IP address assigned by the router via DHCP.
- When the Cloud indicator stays solid, it means the wired network connection is successfully established.
- Note:
If your network does not use DHCP, or if you prefer to assign a static IP to the print server, you’ll need to manually configure the IP settings via the device management page.
- Note:
Step 2: Use the Virtual USB Tool to enable USB device connectivity over the network
Download and install the Virtual USB Connect Tool.
Connecting / Disconnecting to / from a USB device
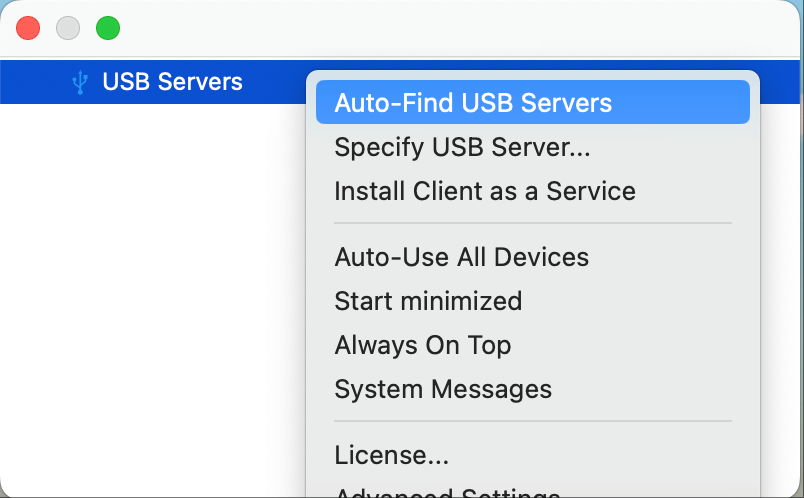
- Run the “Virtual USB Client” software after installation.
- Right-click and select “Auto-Find USB Servers” to display the print servers available on your local network.
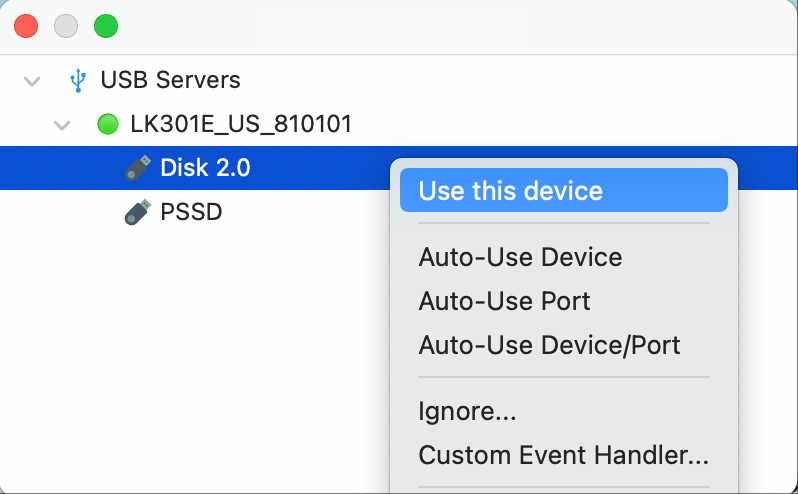
- Select the USB device you wish to connect to. Right-click on the device and choose “Use this device”. This action simulates a virtual connection between your printer or scanner and the computer.
- This action simulates a virtual connection between your USB device and the computer.
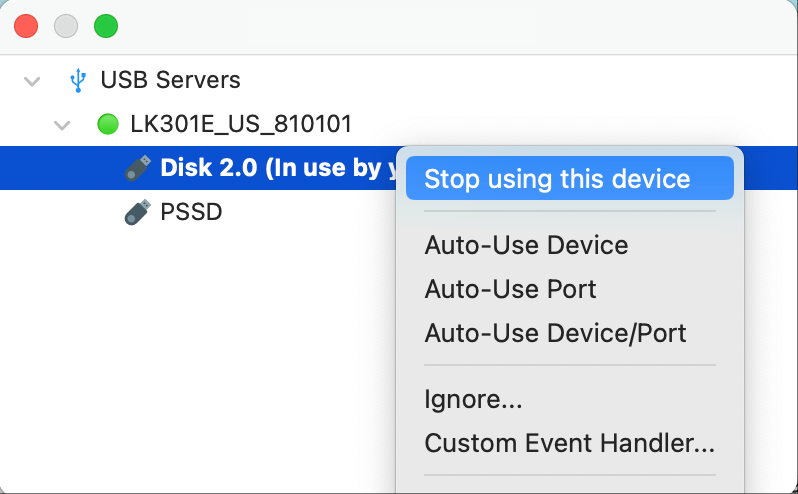
- Disconnect the device (if needed):
- In the tool, click “Disconnect” to release the USB device so that it can be used by another computer.
Important Notes:
- Each USB device can only be connected and controlled by one computer at a time.
- One computer can connect and control up to 3 USB devices simultaneously.
- If another computer needs to use a device, please disconnect it from the current computer first.
- Ensure your computer is on the same local network as the print server to ensure proper discovery and connection.
I get the error “Operation not permitted” (-1) trying to use this device when I click “Use this Device.” What does it mean?
This error usually occurs because another computer is currently using the USB device, preventing your computer from accessing it.
Our virtual USB system only allows one computer to access the same device at a time to avoid accidental disconnections or interruptions during printing or scanning.
Please try the following steps:
1. Check if any other computer is connected to the device.
2. If so, disconnect the device from the other computer.
3. Then, try connecting again on your computer.
If the problem persists, you can try restarting the Virtual USB Tool or the device and then reconnecting.